
TM 5-2410-240-23-3
0209
INSTALLATION CONTINUED
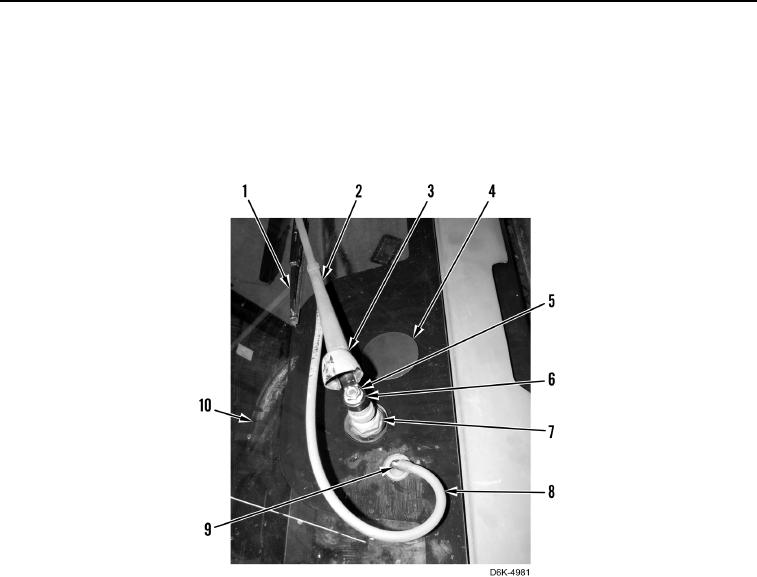
5. Install wiper arm (Figure 8, Item 2), new lockwasher (Figure 8, Item 6), nut (Figure 8, Item 5), and cover
(Figure 8, Item 3) on wiper motor (Figure 8, Item 7). Torque nut to 17 lb-ft (23 Nm).
6. Connect hose (Figure 8, Item 8) on fitting (Figure 8, Item 9).
7. Install wiper blade (Figure 8, Item 1) on wiper arm (Figure 8, Item 2).
8. Install new door seal (Figure 8, Item 4) on door (Figure 8, Item 10).
Figure 8. Door Wiper Motor Arm and Fasteners.
0209
END OF TASK
FOLLOW-ON TASKS
000209
Verify correct operation of machine (TM 5-2410-240-10).
END OF TASK
END OF WORK PACKAGE
0209-7/(8 blank)