
TM 5-2410-241-23-3
0201
DOOR LATCH DISASSEMBLY CONTINUED
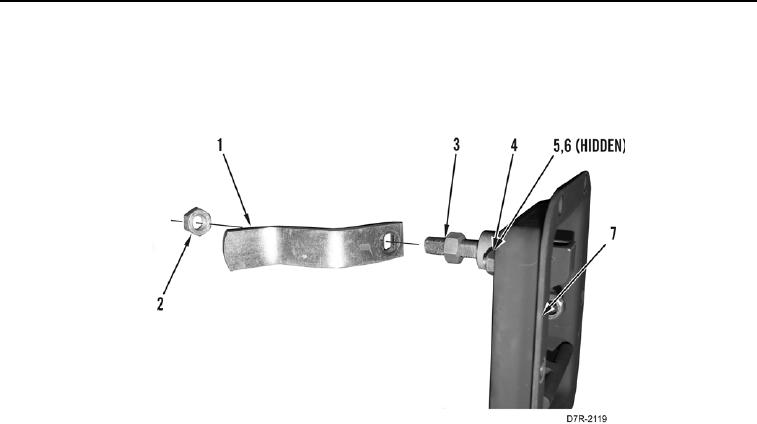
2. Remove locknut (Figure 5, Item 2) and pawl (Figure 5, Item 1) from latch (Figure 5, Item 3). Discard locknut.
3. Remove two bolts (Figure 5, Item 6), locknuts (Figure 5, Item 4), washers (Figure 5, Item 5) and latch handle
(Figure 5, Item 3) from latch assembly (Figure 5, Item 7). Discard locknuts.
Figure 5. Latch Pawl.
0201
END OF TASK