
TM 5-2410-241-23-3
0246
FRONT WINDOW INSTALLATION
000246
WARN I N G
To prevent injury to personnel, wear protective eye covering and gloves.
N OT E
Apply liquid detergent to rubber seal to aid installation.
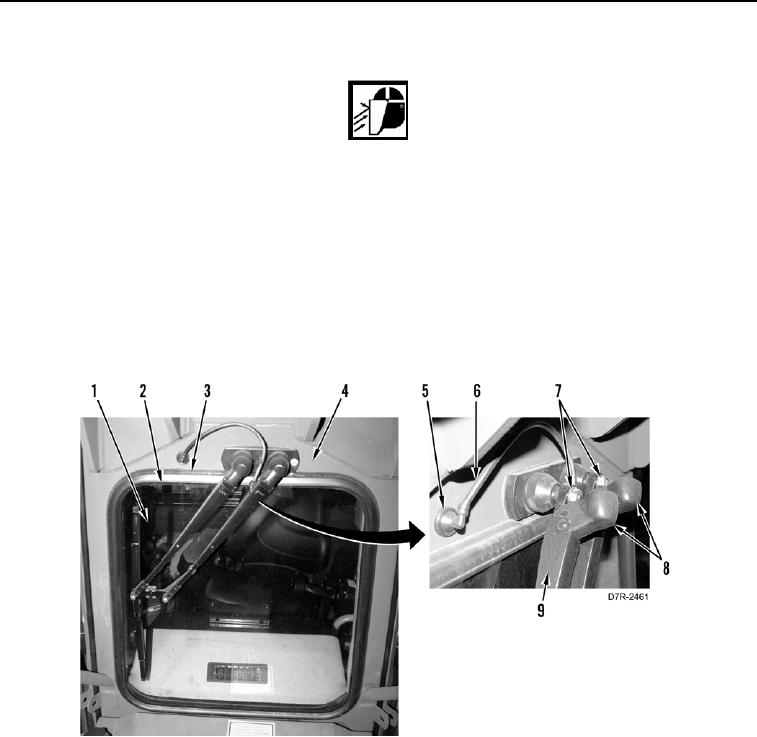
1. Install front window (Figure 8, Item 1) and rubber seal (Figure 8, Item 3) on cab (Figure 8, Item 4).
2. Lock core (Figure 8, Item 2) on rubber seal (Figure 8, Item 3).
3. Install two wiper arms (Figure 8, Item 9) and nuts (Figure 8, Item 7) on machine.
4. Close two caps (Figure 8, Item 8) on wiper arms (Figure 8, Item 9).
5. Connect hose (Figure 8, Item 6) to nipple (Figure 8, Item 5).
Figure 8. Front Window.
0246
END OF TASK
FOLLOW-ON TASKS
000246
Verify correct operation of machine (TM 5-2410-241-10).
END OF TASK
END OF WORK PACKAGE