
TM 5-2410-241-23-3
0289
INSTALLATION CONTINUED
4. Install two plates (Figure 8, Item 1), four washers (Figure 8, Item 3), bolts (Figure 8, Item 2), washers (Figure 8,
Item 5), and nuts (Figure 8, Item 4) on two mounts (Figure 8, Item 6).
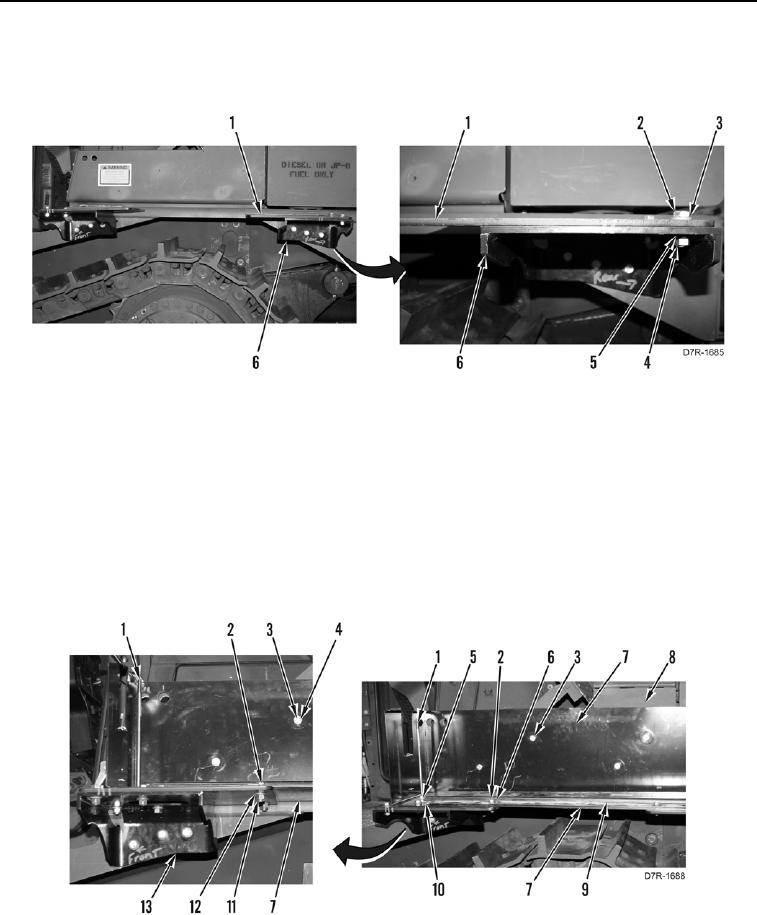
Figure 8. Plate.
0289
5. With assistance, install arctic kit battery box (Figure 9, Item 7), four washers (Figure 9, Item 4), and bolts
(Figure 9, Item 3) on arctic kit battery box mounts (Figure 9, Item 13) and battery box enclosure (Figure 9,
Item 8).
6. Install two nuts (Figure 9, Item 5) on studs (Figure 9, Item 1).
7. Install two washers (Figure 9, Item 10) and studs (Figure 9, Item 1) on arctic kit battery box (Figure 9, Item 7).
8. Tighten two nuts (Figure 9, Item 5) on studs (Figure 9, Item 1).
9. Install gusset plate (Figure 9, Item 9), eight washers (Figure 9, Item 6), bolts (Figure 9, Item 2), washers
(Figure 9, Item 12), and nuts (Figure 9, Item 11) on arctic kit battery box (Figure 9, Item 7).
Figure 9. Arctic Kit Battery Box.
0289