
TM 5-2410-240-23-3
0223
ASSEMBLY
000223
1. Install upper bracket (Figure 6, Item 1), clamp (Figure 6, Item 5), two washers (Figure 6, Item 3), and bolts
(Figure 6, Item 4) on fuel tank (Figure 6, Item 2).
2. Install two brackets (Figure 5, Item 1), bracket (Figure 5, Item 3), two brackets (Figure 5, Item 2), four washers
(Figure 5, Item 5), two bolts (Figure 5, Item 4), and nuts (Figure 5, Item 6) on washer bottle (Figure 5, Item 7).
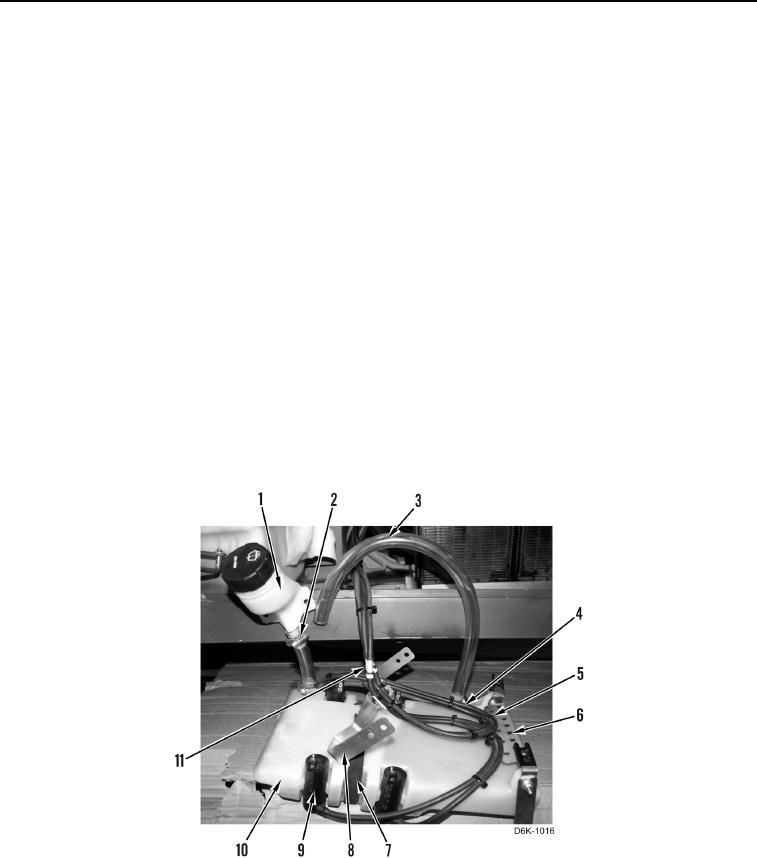
3. Install new seal (Figure 7, Item 7) on both sides of washer bottle (Figure 7, Item 10).
4. Install four washer pumps (Figure 7, Item 9) on washer bottle (Figure 7, Item 10).
N OT E
Install hoses as tagged during removal.
5. Connect four hoses (Figure 7, Item 4) to four washer pumps (Figure 7, Item 9).
6. Connect four hoses (Figure 7, Item 4) to check valves (Figure 7, Item 11).
N OT E
Install tiedown straps as noted during removal.
7. Install hoses (Figure 7, Item 4) and three new tiedown straps (Figure 7, Item 5) on brackets (Figure 7, Items 6
and 8).
8. Install fill spout (Figure 7, Item 1), two hoses (Figure 7, Item 3), and three clamps (Figure 7, Item 2) on washer
bottle (Figure 7, Item 10).
Figure 7. Washer Pumps.
0223