
TM 5-2410-240-23-3
0223
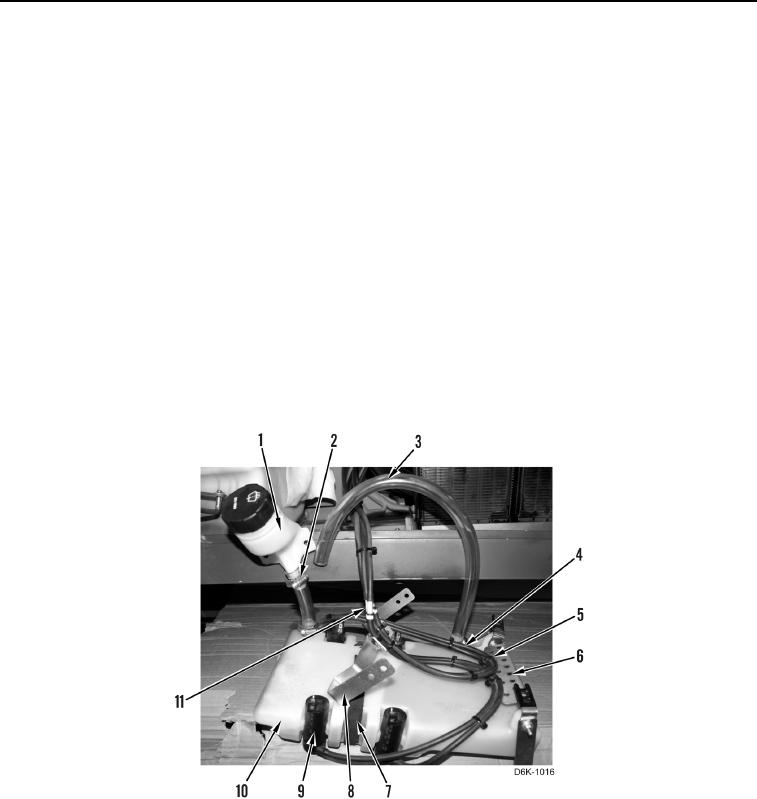
DISASSEMBLY CONTINUED
3. Drain washer bottle (Figure 4, Item 10) of washer fluid into a suitable container.
4. Remove three clamps (Figure 4, Item 2), two hoses (Figure 4, Item 3), and fill spout (Figure 4, Item 1) from
washer bottle (Figure 4, Item 10).
N OT E
Note location and quantity of tiedown straps to aid installation.
5. Remove three tiedown straps (Figure 4, Item 5) and four hoses (Figure 4, Item 4) from brackets (Figure 4,
Items 6 and 8). Discard tiedown straps.
N OT E
Tag and mark hoses to aid installation.
6. Disconnect four hoses (Figure 4, Item 4) from check valves (Figure 4, Item 11).
7. Disconnect four hoses (Figure 4, Item 4) from four washer pumps (Figure 4, Item 9).
8. Remove four washer pumps (Figure 4, Item 9) from washer bottle (Figure 4, Item 10).
9. Remove seal (Figure 4, Item 7) from both sides of washer bottle (Figure 4, Item 10). Discard seal.
Figure 4. Washer Pumps.
0223