
TM 5-2410-240-23-3
0226
INSTALLATION CONTINUED
N OT E
Install hoses as noted during removal.
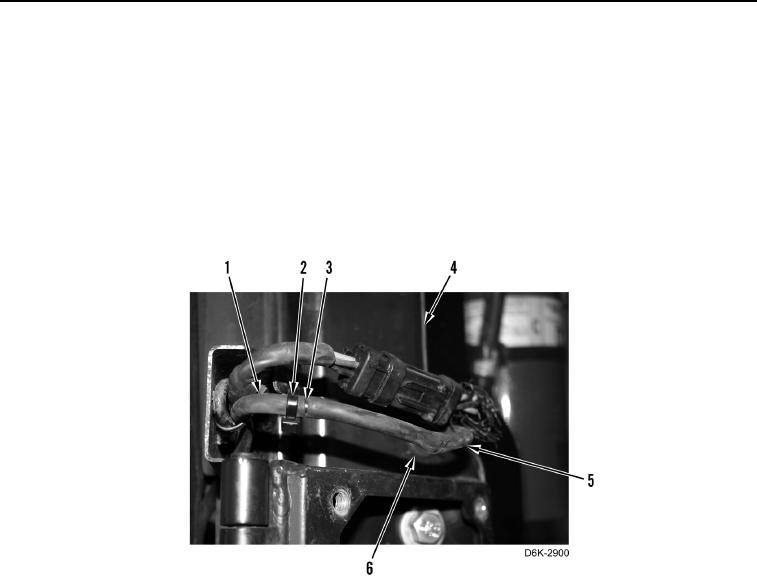
6. Connect door washer hose (Figure 12, Item 5) to connector (Figure 12, Item 3) and install door washer hose
through door (Figure 12, Item 4).
7. Connect washer hose (Figure 12, Item 1) to connector (Figure 12, Item 3).
8. Secure washer hose (Figure 12, Item 5) with new tiedown strap (Figure 12, Item 2).
9. Install grommet (Figure 12, Item 6) in door (Figure 12, Item 4).
Figure 12. Hose in Door Routing.
0226