• Home
  • Download PDF
  • Order CD-ROM
  • Order in Print
Figure 25. Door Handle and Gasket.
Figure 28. Door Handle Adjustment.

Field Maintenance Manual 3 D6K Dozer Type I With Winch and Type II With Ripper
Page Navigation
  880    881    882    883    884  885  886    887    888    889    890  
img
.
TM 5-2410-240-23-3
0255
ASSEMBLY CONTINUED
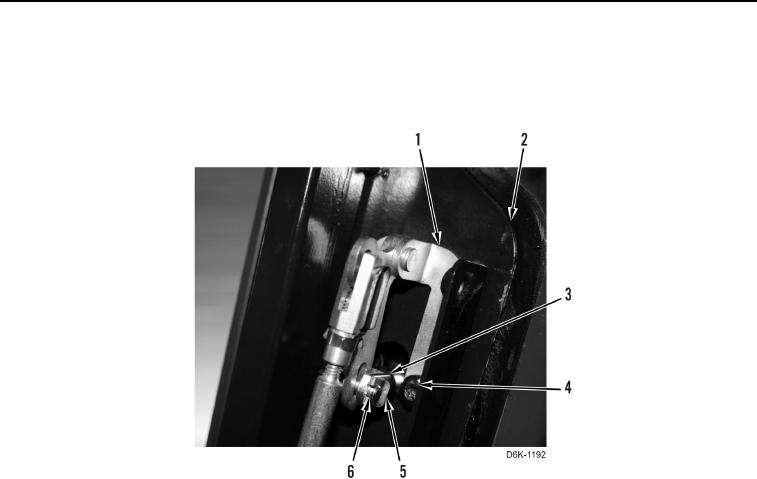
11. Install bellcrank assembly (Figure 27, Item 1) and two screws (Figure 27, Item 4) on door (Figure 27, Item 2).
12. Install bellcrank assembly (Figure 27, Item 1), pin (Figure 27, Item 6), and clip (Figure 27, Item 5) on door
handle clevis (Figure 27, Item 3).
Figure 27. Door Handle and Components.
0255
0255-23


Privacy Statement
Press Release
Contact

© Copyright Integrated Publishing, Inc.. All Rights Reserved.