
TM 5-2410-241-23-3
0198
INSTALLATION CONTINUED
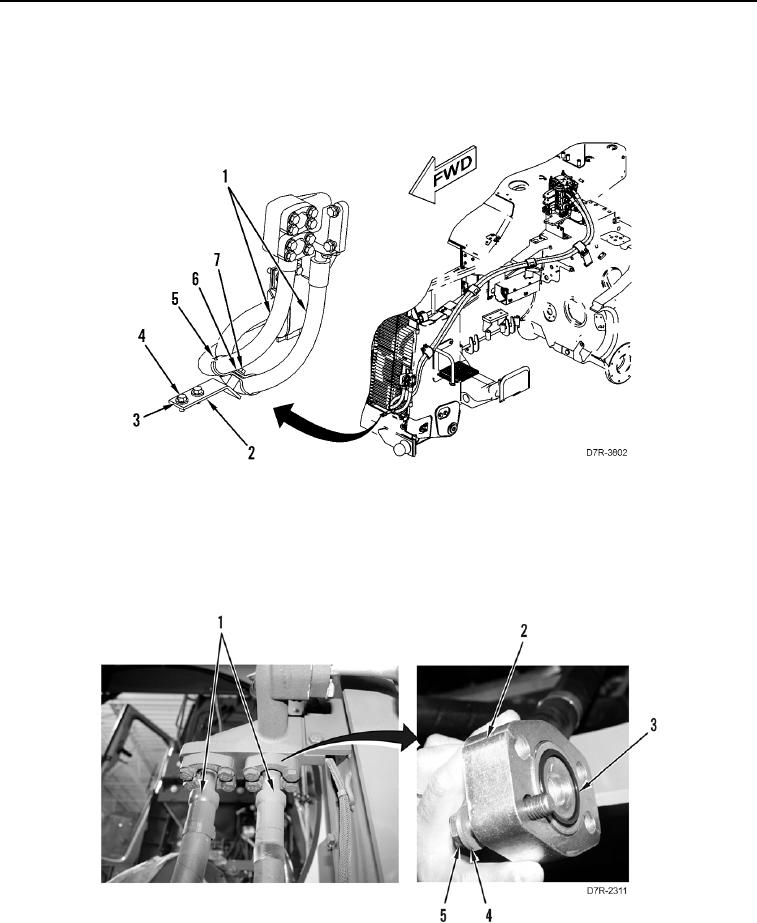
13. Install bracket (Figure 17, Item 2), two washers (Figure 17, Item 3), and bolts (Figure 17, Item 4) on machine.
14. Install retaining strap (Figure 17, Item 5), washer (Figure 17, Item 6), and bolt (Figure 17, Item 7) on two hoses
(Figure 17, Item 1).
Figure 17. Radiator Hose Clamp.
0198
15. Install two new O-rings (Figure 18, Item 3) on two hoses (Figure 18, Item 1).
16. Install two hoses (Figure 18, Item 1), flanges (Figure 18, Item 2), eight washers (Figure 18, Item 4), and bolts
(Figure 18, Item 5) on machine.
Figure 18. Tilt Hose Connection.
0198