
TM 5-2410-241-23-3
0252
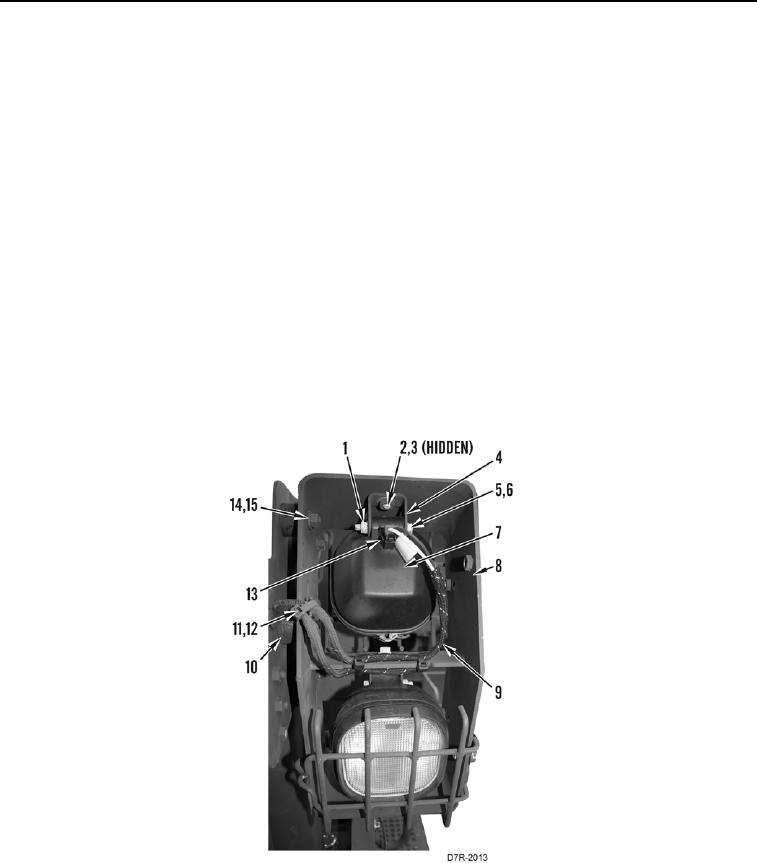
INSTALLATION
000252
N OT E
Nuts are located on both sides of flexible mount.
1. Install four flexible mounts (Figure 8, Item 10), washers (Figure 8, Item 15), and nuts (Figure 8, Item 14) on
guard (Figure 8, Item 8).
2. Install guard (Figure 8, Item 8), ladder clip (Figure 8, Item 12), four washers (Figure 8, Item 15), and nuts
(Figure 8 Item 14) on machine.
3. Position bracket (Figure 8, Item 4) on flood lamp (Figure 8, Item 7) and install bolt (Figure 8, Item 5), two
washers (Figure 8, Item 6), and nut (Figure 8, Item 1).
4. Install flood lamp (Figure 8, Item 7), washer (Figure 8, Item 2), and bolt (Figure 8, Item 3) on guard (Figure 8,
Item 8).
N OT E
Install electrical connector as tagged during removal.
5. Connect electrical connector (Figure 8, Item 13).
6. Route wiring harness (Figure 8, Item 9) and install new tiedown straps (Figure 8, Item 11).
Figure 8. Flood Lamp Assembly.
0252
END OF TASK