
TM 5-2410-240-23-3
0232
INSTALLATION CONTINUED
N OT E
Install electrical connectors as tagged during removal.
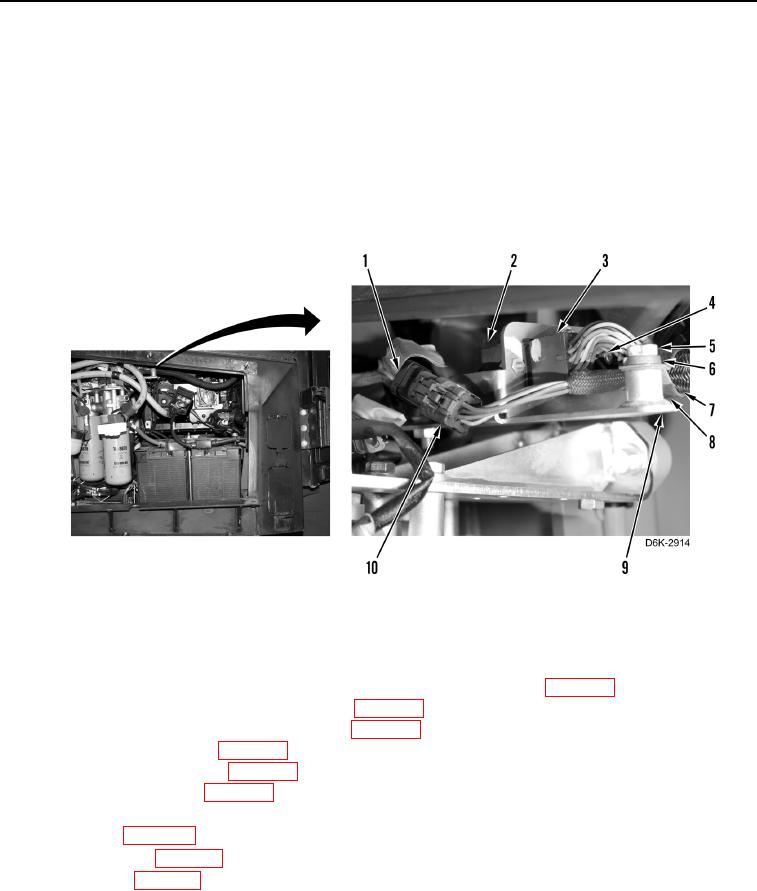
40. Connect platform harness (Figure 20, Item 3) and tighten screw (Figure 20, Item 4) on chassis harness
(Figure 20, Item 2).
41. Install clamp (Figure 20, Item 8) on harness (Figure 20, Item 7).
42. Install clamp (Figure 20, Item 8), washer (Figure 20, Item 6), and bolt (Figure 20, Item 5) on machine
(Figure 20, Item 9).
43. Connect platform harness (Figure 20, Item 10) on chassis harness (Figure 20, Item 1).
Figure 20. Harness Connectors and Retaining Hardware Above Hydraulic Filters.
0232
END OF TASK
FOLLOW-ON TASKS
000232
1.
If arctic kit heater equipped, install arctic kit heater switch and heater harness (WP 0277).
2.
Install fuel tank guard and access cover (Ripper) (WP 0194).
3.
Install fuel tank guard and access cover (Winch) (WP 0195).
4.
Install left rear access panel (WP 0193).
5.
Install right rear access panel (WP 0190).
6.
Install front cab floor plate (WP 0205).
7.
Install batteries (WP 0142).
8. Recharge A/C (WP 0254).
9. Install rifle bracket (WP 0211).
10. Install rear mat (WP 0212)
11. Check engine coolant (WP 0043).
END OF TASK
END OF WORK PACKAGE