
TM 5-2410-240-23-2
0091
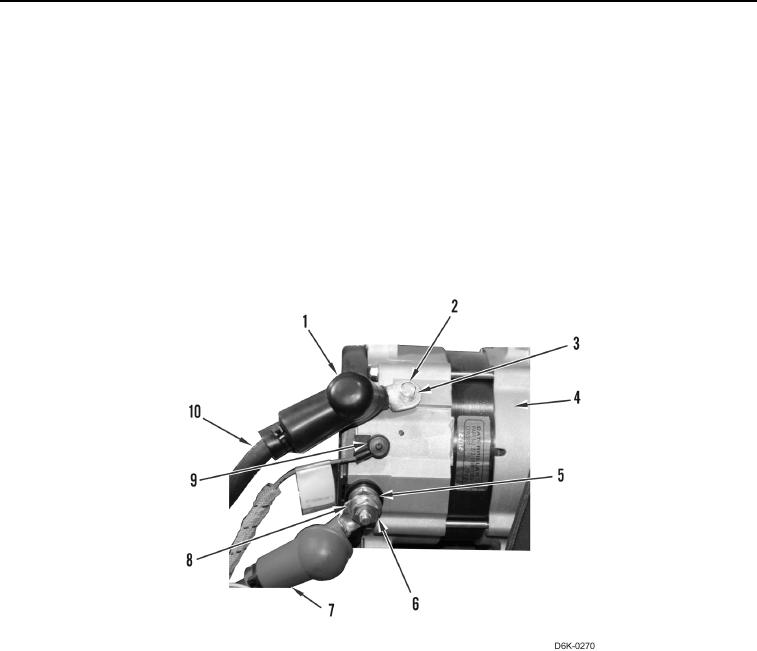
ALTERNATOR REMOVAL CONTINUED
N OT E
Tag wires and wiring harnesses to aid installation.
3. Position boot (Figure 2, Item 1) and boot (Figure 2, Item 7) aside.
4. Remove nut (Figure 2, Item 6), washer (Figure 2, Item 5), and wire (Figure 2, Item 8) from alternator (Figure 2,
Item 4).
5. Remove bolt (Figure 2, Item 2), washer (Figure 2, Item 3), and wire (Figure 2, Item 10) from alternator
(Figure 2, Item 4).
6. Disconnect wire (Figure 2, Item 9) from alternator (Figure 2, Item 4).
7. Remove alternator (Figure 2, Item 4) from machine.
Figure 2. Alternator Wiring Harness.
0091