
TM 5-2410-240-23-2
0091
ALTERNATOR BRACKET INSTALLATION CONTINUED
C AU T I O N
During installation, support alternator in position while connecting wires. Allowing
alternator to hang on wires or to fall may damage equipment.
N OT E
Install wires and wiring harnesses as noted during removal.
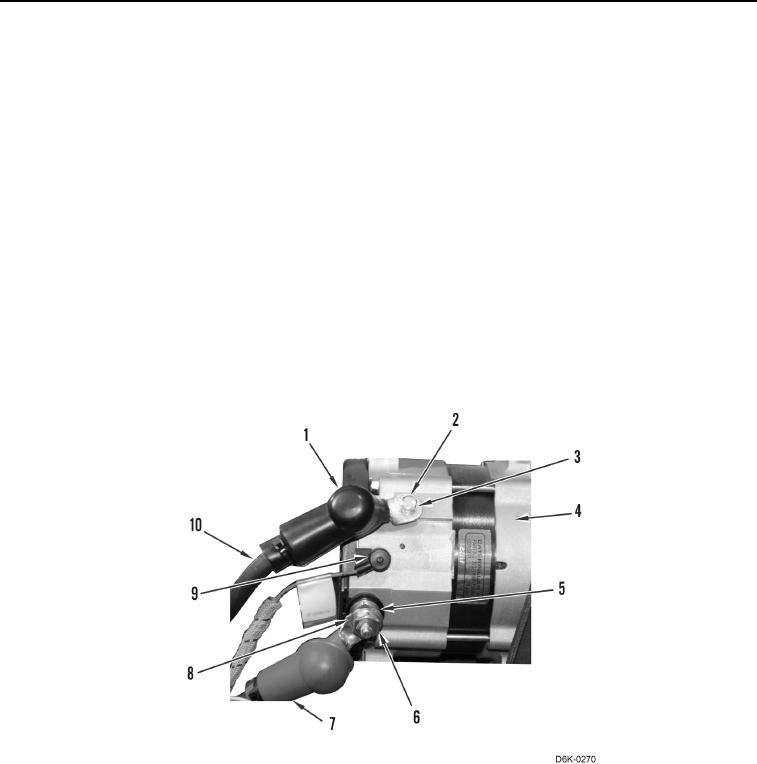
2. Position alternator (Figure 8, Item 4) on machine.
3. Connect wire (Figure 8, Item 9) on alternator (Figure 8, Item 4).
4. Connect wire (Figure 8, Item 10), washer (Figure 8, Item 3), and bolt (Figure 8, Item 2) on alternator (Figure 8,
Item 4).
5. Connect wire (Figure 8, Item 8), washer (Figure 8, Item 5), and nut (Figure 8, Item 6) on alternator (Figure 8,
Item 4). Torque nut to 18.2 2.4 Nm (13 2 lb-ft).
6. Position boot (Figure 8, Item 7) over nut (Figure 8, Item 6).
7. Position boot (Figure 8, Item 1) over bolt (Figure 8, Item 2).
Figure 8. Alternator Wiring Harness.
0091