
TM 5-2410-240-23-3
0181
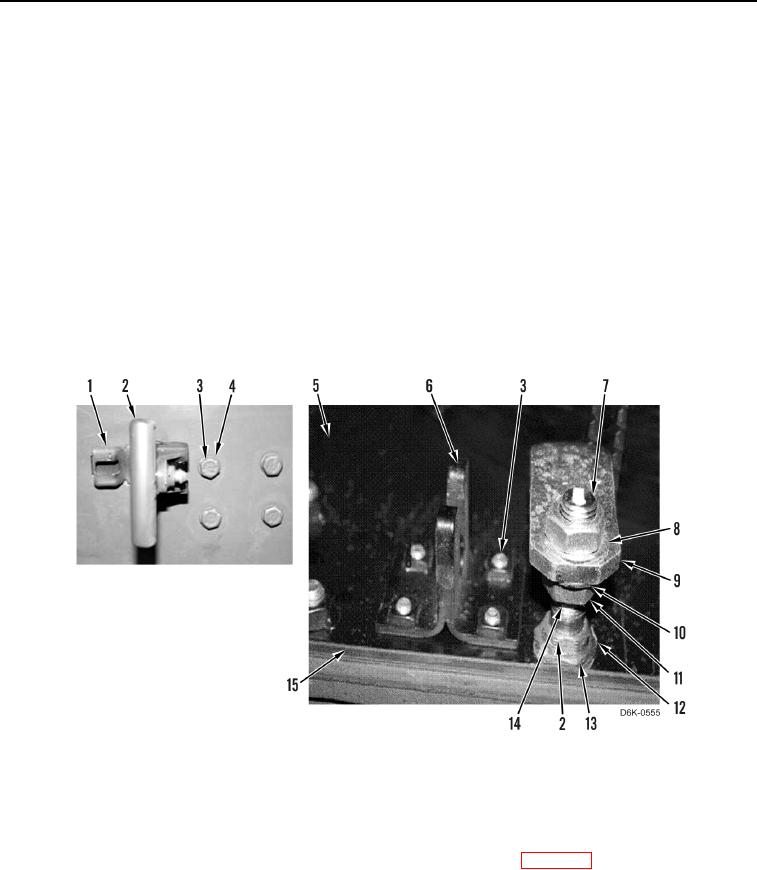
DISASSEMBLY CONTINUED
3. Remove eight bolts (Figure 6, Item 3), washers (Figure 6, Item 4), and two brackets (Figure 6, Item 6) from
radiator access door (Figure 6, Item 5).
N OT E
Note thread count to maintain latch adjustment.
4. Count threads (Figure 6, Item 14) below nuts (Figure 6, Item 11).
5. Remove two nuts (Figure 6, Item 7), washers (Figure 6, Item 8), pawls (Figure 6, Item 9), washers (Figure 6,
Item 10), and nuts (Figure 6, Item 11) from latches (Figure 6, Item 2).
6. Bend tabs on washers (Figure 6, Item 12) away from nuts (Figure 6, Item 13).
7. Remove two nuts (Figure 6, Item 13) and washers (Figure 6, Item 12) from latches (Figure 6, Item 2).
8. Remove two latches (Figure 6, Item 2) and brackets (Figure 6, Item 1) from radiator access door (Figure 6,
Item 5).
9. Remove seal (Figure 6, Item 15) from radiator access door (Figure 6, Item 5).
Figure 6. Radiator Access Door Hardware.
0181
END OF TASK
CLEANING AND INSPECTION
000181
Clean and inspect all parts IAW Mechanical General Maintenance Instructions (WP 0282).
END OF TASK