
TM 5-2410-240-23-3
0278
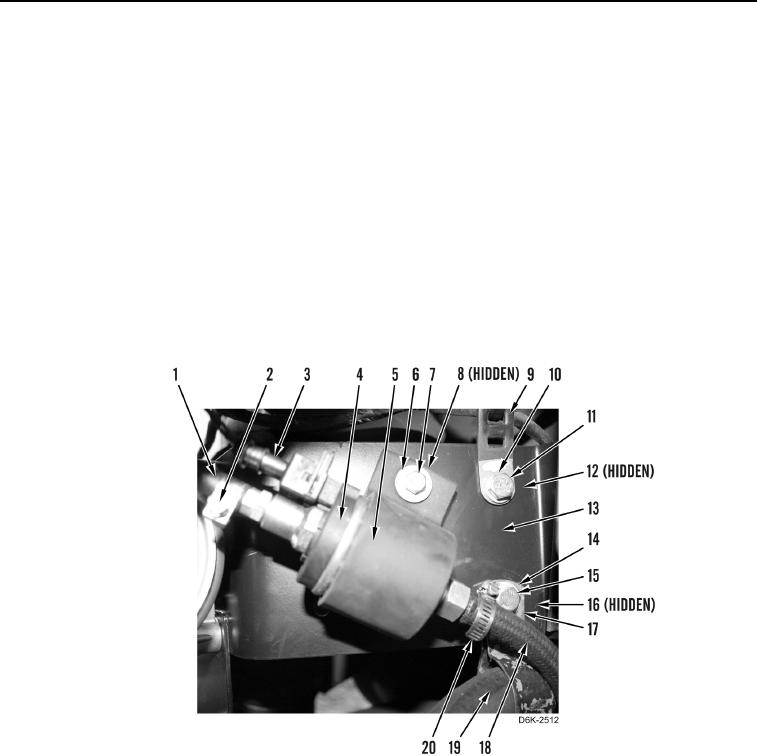
ARCTIC HEATER BRACKET INSTALLATION
000278
1. Position arctic heater mounting bracket (Figure 7, Item 13) on machine.
2. Install clamp (Figure 7, Item 17) and lower heater hose (Figure 7, Item 19) on arctic heater mounting bracket
(Figure 7, Item 13) with bolt (Figure 7, Item 15), nut (Figure 7, Item 16), and washer (Figure 7,
Item 14).
3. Install clip (Figure 7, Item 9) on arctic heater mounting bracket (Figure 7, Item 13) with bolt (Figure 7,
Item 11), nut (Figure 7, Item 12), and washer (Figure 7, Item 10).
4. Install rubber isolated bracket (Figure 7, Item 5) and fuel pump (Figure 7, Item 4) on arctic heater mounting
bracket (Figure 7, Item 13) with bolt (Figure 7, Item 7), nut (Figure 7, Item 8), and washer (Figure 7, Item 6).
5. Connect lower fuel hose (Figure 7, Item 18) to fuel pump (Figure 7, Item 4) and tighten clamp (Figure 7,
Item 20).
6. Connect upper fuel hose (Figure 7, Item 1) to fuel pump (Figure 7, Item 4) and tighten clamp (Figure 7, Item 2).
7. Connect wiring harness (Figure 7, Item 3) to fuel pump (Figure 7, Item 4).
8. Install ether valve (WP 0048).
Figure 7. Mounting Bracket and Attachments.
0278