
TM 5-2410-241-23-2
0099
INSTALLATION CONTINUED
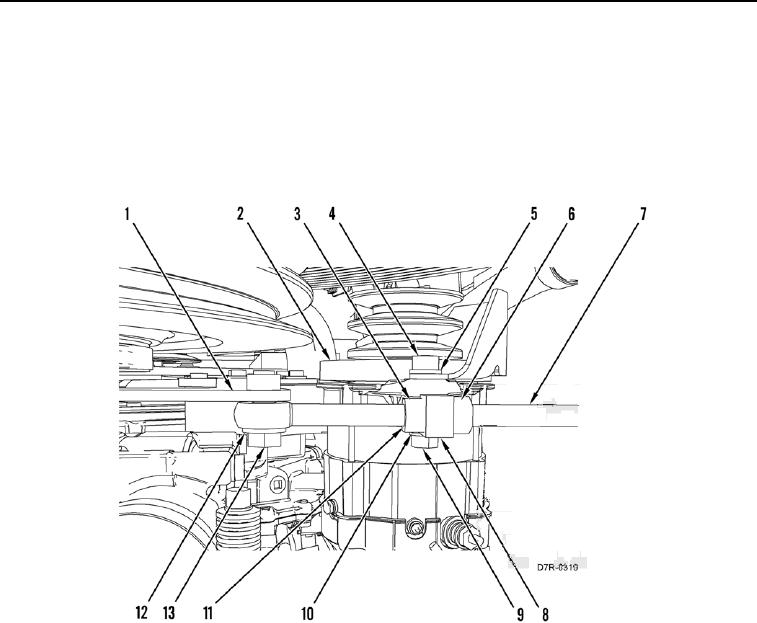
7. Install rod (Figure 10, Item 7), washer (Figure 10, Item 12), and bolt (Figure 10, Item 13) on bracket (Figure 10,
Item 1).
8. Install washer (Figure 10, Item 3), block (Figure 10, Item 8), washer (Figure 10, Item 10), bolt (Figure 10,
Item 9), washer (Figure 10, Item 5), and nut (Figure 10, Item 4) on alternator (Figure 10, Item 2).
9. Tighten nut (Figure 10, Item 11), block (Figure 10, Item 8), and nut (Figure 10, Item 6) on rod (Figure 10,
Item 7).
Figure 10. Alternator and Retaining Hardware.
099