
TM 5-2410-241-23-2
0102
REMOVAL CONTINUED
N OT E
Once removed, rear crankshaft seal must be replaced.
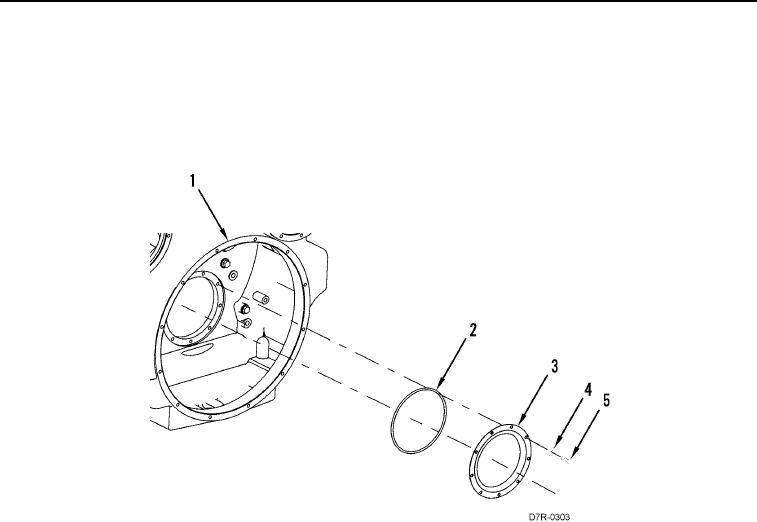
2. Remove nine bolts (Figure 2, Item 5), washers (Figure 2, Item 4), rear crankshaft seal (Figure 2, Item 3), and
O-ring (Figure 2, Item 2) from flywheel housing (Figure 2, Item 1). Discard rear crankshaft seal and O-ring.
Figure 2. Rear Crankshaft Seal, O-ring Seal, and Retaining Hardware.
0102
END OF TASK
CLEANING AND INSPECTION
000102
Clean and inspect all parts IAW Mechanical General Maintenance Instructions (WP 0295).
END OF TASK
INSTALLATION
000102
C AU T I O N
Do not install rear crankshaft seal without plastic sleeve. Seal damage and oil leakage
may result.
Do not lubricate rear crankshaft seal or cran shaft flange. Rear crankshaft seal must be
k
installed dry or oil leakage may result.
N OT E
Replacement rear crankshaft seal includesplastic sleeve, which protects seal lip during
installation. Do not remove plastic sleeve, it will be forced off during installation.
Ensure mounting flange is clean, dry, and free from damage.
Ensure plastic sleeve is squarely insalled within new rear crankshaft seal.
t