
TM 5-2410-241-23-2
0155
REMOVAL CONTINUED
N OT E
Tag cables to aid installation.
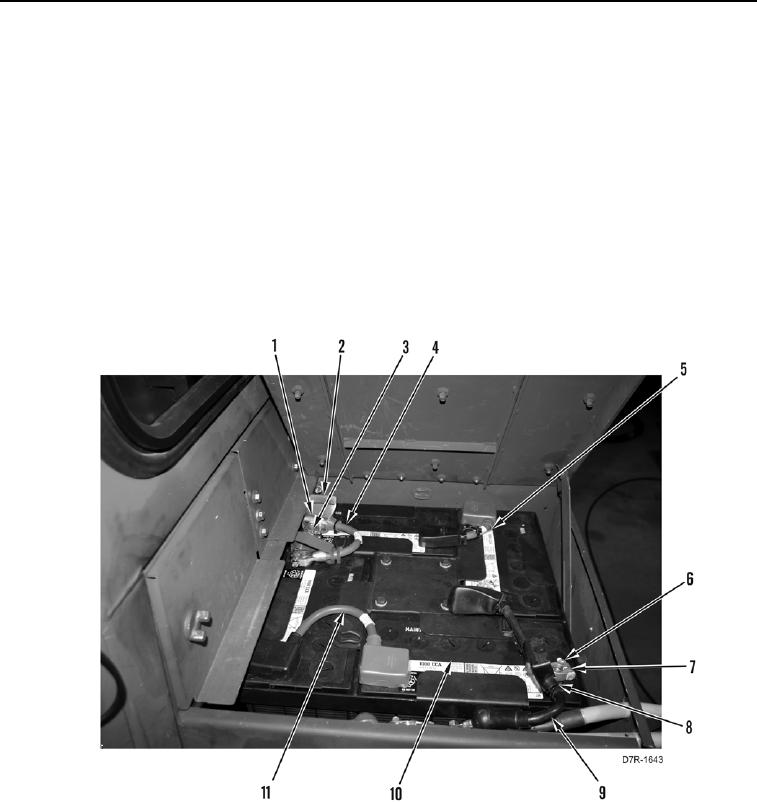
6. Position two covers (Figure 4, Item 8) aside.
7. Loosen two nuts (Figure 4, Item 6), and remove two clamps (Figure 4, Item 7) from batteries (Figure 4,
Item 10).
8. Position battery ground cable (Figure 4, Item 9) aside.
9. Position six covers (Figure 4, Item 2) aside.
10. Loosen six nuts (Figure 4, Item 3) and remove six clamps (Figure 4, Item 1) from batteries (Figure 4, Item 10).
11. Remove two crossover cables (Figure 4, Items 5 and 11) from machine.
12. Position battery power cable (Figure 4, Item 4) aside.
Figure 4. Batteries.
0155