
TM 5-2410-241-23-2
0182
REMOVAL CONTINUED
N OT E
Steps 2 - 4 will remove one horn. Folow same steps for additional horn.
l
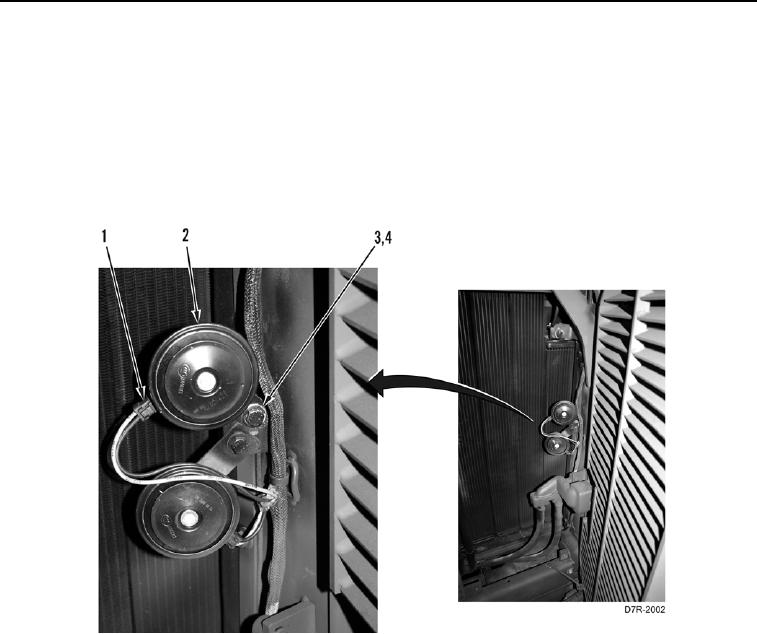
Tag electrical connectors to aid installation.
2. Disconnect electrical connector (Figure 2, Item 1) from horn assembly (Figure 2, Item 2).
3. Remove bolt (Figure 2, Item 3) and washer (Figure 2, Item 4) from horn assembly (Figure 2, Item 2) and
remove horn assembly from machine.
Figure 2. Horn Assembly.
0182