
TM 5-2410-241-23-3
0277
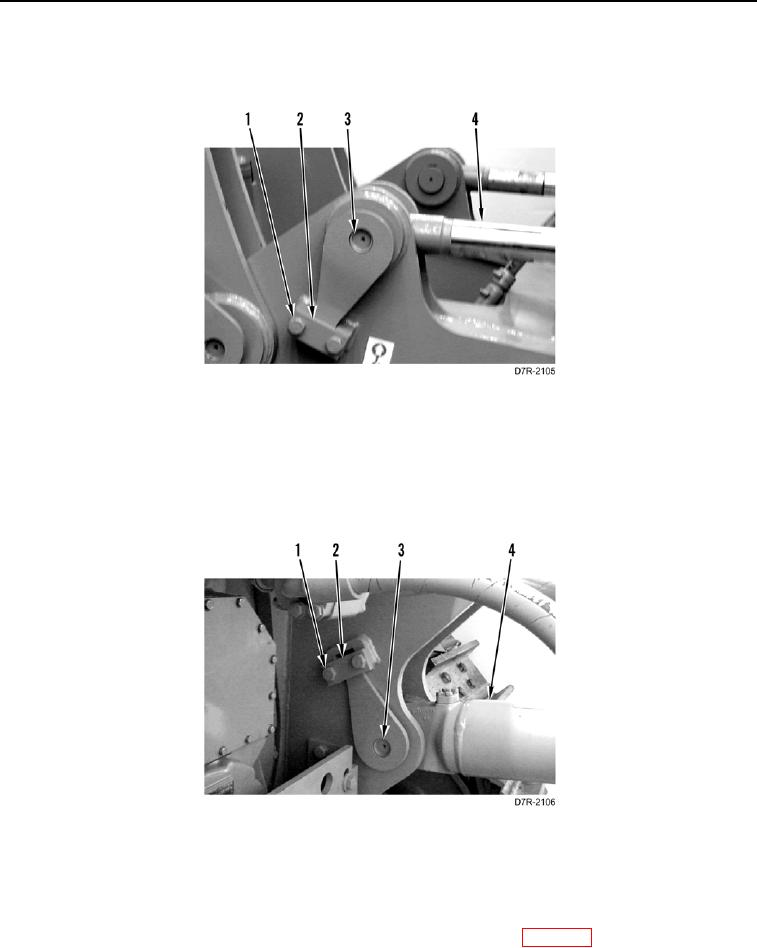
REMOVAL CONTINUED
6. Remove two bolts (Figure 3, Item 1), plate (Figure 3, Item 2), and pin assembly (Figure 3, Item 3) from the rod
end of ripper lift cylinder (Figure 3, Item 4).
Figure 3. Ripper Lift Cylinder Rod End.
0277
7. Remove two bolts (Figure 4, Item 1), plate (Figure 4, Item 2), and pin assembly (Figure 4, Item 3) from head
end of the ripper lift cylinder (Figure 4, Item 4).
8. Remove ripper lift cylinder (Figure 4, Item 4) from machine and place on flat surface.
9. Remove lifting device from ripper lift cylinder (Figure 4, Item 4).
Figure 4. Ripper Lift Cylinder Head End.
0277
END OF TASK
CLEANING AND INSPECTION
000277
Clean and inspect all parts IAW Mechanical General Maintenance Instructions (WP 0295).
END OF TASK