
TM 5-2410-240-23-2
0119
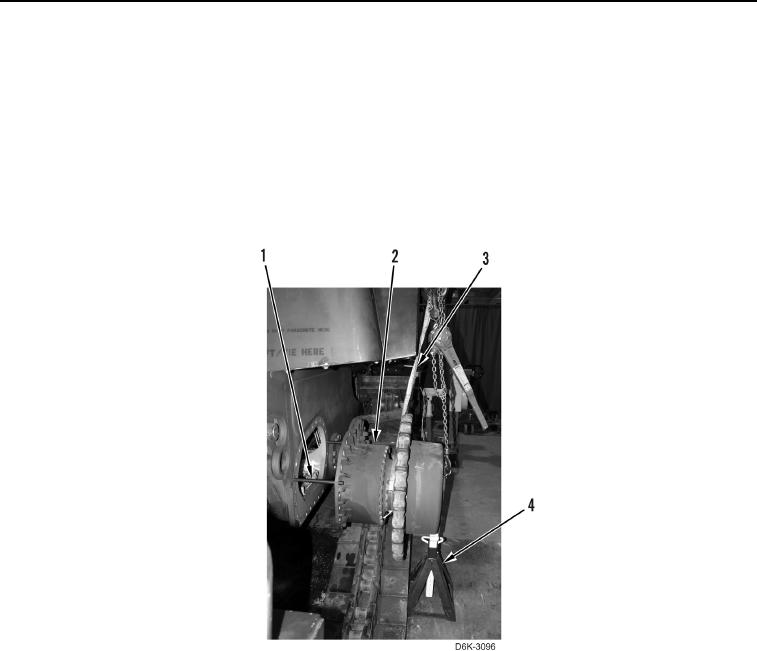
REMOVAL CONTINUED
11. Using lifting device, slide final drive assembly (Figure 4, Item 2) away from machine on guide studs (Figure 4,
Item 1) and support with jack stand (Figure 4, Item 4).
12. Install second lifting device (Figure 4, Item 3) on inner portion of final drive (Figure 4, Item 2).
13. Adjust lifting device and remove jack stand (Figure 4, Item 4).
14. Using lifting device, remove final drive assembly (Figure 4, Item 2) from machine. Place final drive assembly
on flat level surface.
15. Remove lifting device from final drive assembly (Figure 4, Item 2).
16. Remove two guide studs (Figure 4, Item 1) from machine.
Figure 4. Final Drive Removal.
0119
END OF TASK
CLEANING AND INSPECTION
000119
Clean and inspect all parts IAW Mechanical General Maintenance Instructions (WP 0282).
END OF TASK