
TM 5-2410-240-23-3
0180
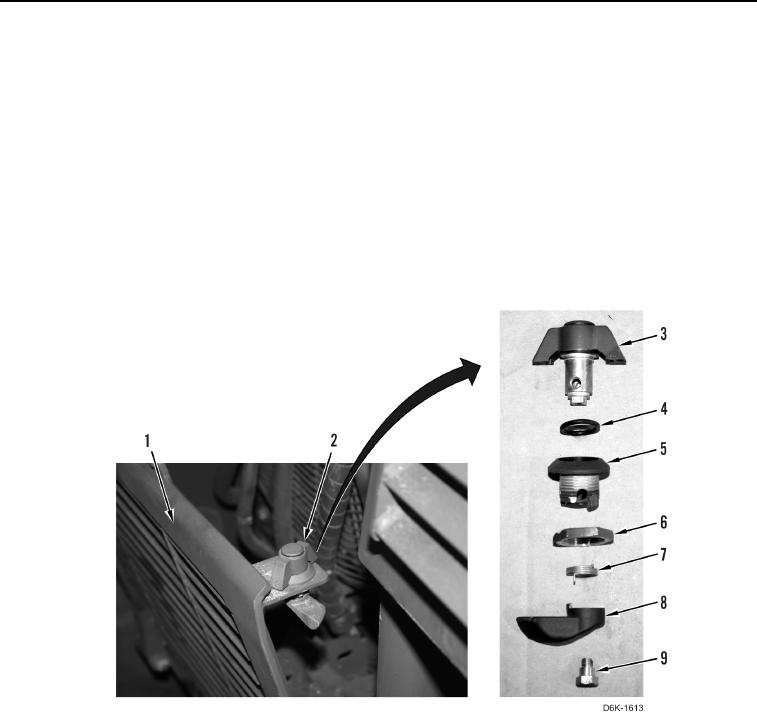
LOWER RADIATOR GRILL LATCH ASSEMBLY REMOVAL
000180
1. Unlatch and open upper radiator grill (TM 5-2410-240-10).
2. Turn latch handle (Figure 5, Item 2) and open lower radiator grill (Figure 5, Item 1).
N OT E
Note relation and position of latch handle, latch body, and latch cam to aid installation.
3. Remove bolt (Figure 5, Item 9) and latch cam (Figure 5, Item 8) from latch handle (Figure 5, Item 3).
4. Remove spring (Figure 5, Item 7) from latch cam (Figure 5, Item 8).
5. Remove latch handle (Figure 5, Item 3) and O-ring (Figure 5, Item 4) from latch body (Figure 5, Item 5).
Discard O-ring.
6. Remove nut (Figure 5, Item 6) and latch body (Figure 5, Item 5) from lower radiator grill (Figure 5, Item 1).
Figure 5. Latch Assembly and Lower Radiator Grill.
0180
END OF TASK