
TM 5-2410-240-23-3
0265
INSTALLATION CONTINUED
WARN I N G
Use caution when using adhesives and sealants. Prolonged inhalation of vapors can
cause lung irritation. Contact with skin can cause dermatitis. Wear gloves and safety
goggles and use product in a well-ventilated area away from open flame. If ingested, keep
individual calm and seek medical attention. DO NOT induce vomiting. If contact with skin
or eyes is made, flush thoroughly with water. Dispose of cleanup rags IAW local policy and
ordinances. Failure to follow this warning may cause injury to personnel.
N OT E
Make sure paint, rust, dirt, and grease are removed from mounting surface of winch, lower
winch mounting bracket, and machine.
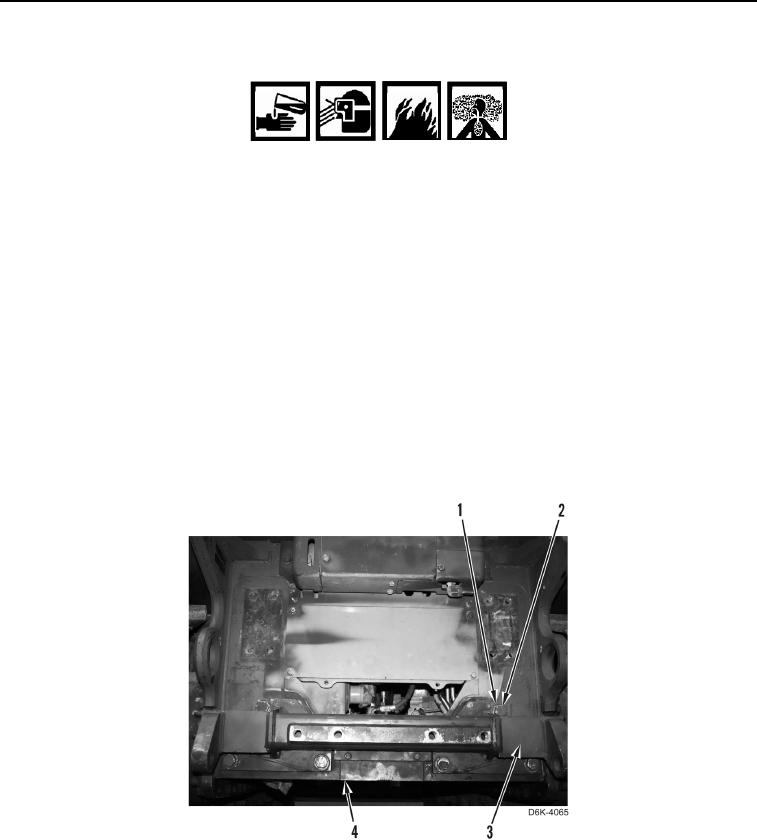
8. Apply sealing compound on six bolts (Figure 16, Items 1).
9. Install lower winch mounting bracket (Figure 16, Item 3), six washers (Figure 16, Item 2), and bolts (Figure 16,
Item 1) on winch (Figure 16, Item 4).
10. Torque six bolts (Figure 16, Item 1) to 100 lb-ft (135 Nm). After tightening bolts, make sure all slack is removed
from between mating surfaces. If misaligned, loosen bolts and repeat installation process.
11. Torque six bolts (Figure 16, Item 1) to 680 lb-ft (922 Nm).
Figure 16. Lower Winch Mounting Bracket and Retaining Hardware.
0265