
TM 5-2410-241-23-1
0026
COOLING SYSTEM INSPECTION CONTINUED
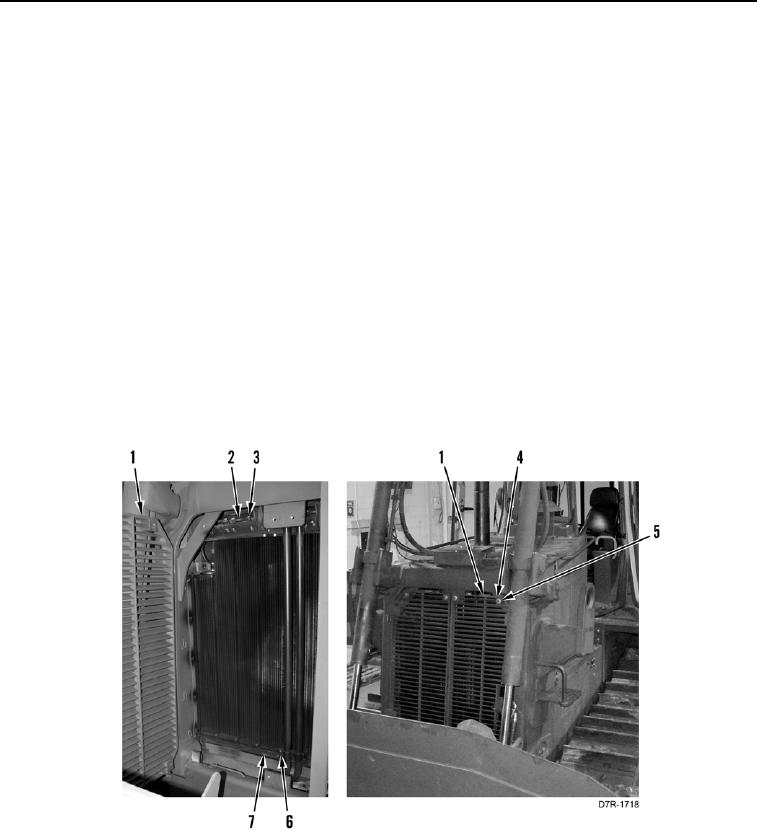
5. Remove eight bolts (Figure 3, Item 4), washers (Figure 3, Item 5), and open two doors (Figure 3, Item 1) on
machine.
6. Inspect 9 radiator cores (Figure 3, Item 6) for Class III leaks and damage.
a. If Class III leak is on radiator core (Figure 3, Item 6), replace radiator core (WP 0109).
b. If radiator cores are OK, proceed to step 7.
7. Inspect eight radiator core crossover hoses (Figure 3, Item 2) and 16 clamps (Figure 3, Item 3) for Class III
leaks and damage.
a. If Class III leak is at clamp (Figure 3, Item 3), tighten clamp.
b. If radiator core crossover hose (Figure 3, Item 2) has Class III leak or damage, replace radiator core cross-
over hose (WP 0109).
c.
If radiator core crossover hoses (Figure 3, Item 2) and 16 clamps (Figure 3, Item 3) are OK, proceed to
step 8.
8. Inspect lower radiator tank (Figure 3, Item 7) for Class III leaks and damage.
a. If Class III leak is on lower radiator tank (Figure 3, Item 7), replace lower radiator tank (WP 0110).
b. If lower radiator tank (Figure 3, Item 7) is OK, proceed to step 9.
9. Close two doors (Figure 3, Item 1) and install eight washers (Figure 3, Item 5) and bolts (Figure 3, Item 4) on
machine.
Figure 3. Radiator.
0026