
TM 5-2410-241-23-2
0164
INSTALLATION CONTINUED
N OT E
Install electrical connections and cable as noted during removal.
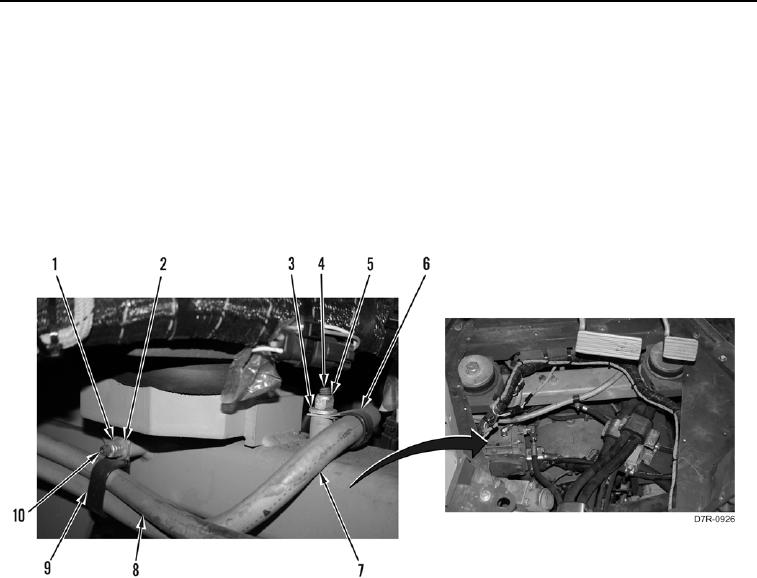
6. Position starter cable (Figure 6, Item 7) on machine.
7. Install clamp (Figure 6, Item 6), washer (Figure 6, Item 3), nut (Figure 6, Item 5), and starter cable (Figure 6,
Item 7) on stud (Figure 6, Item 4).
8. Install two clamps (Figure 6, Item 9), washers (Figure 6, Item 2), nuts (Figure 6, Item 1), alternator cable
(Figure 6, Item 8), and starter cable (Figure 6, Item 7) on stud (Figure 6, Item 10).
Figure 6. Starter Cable to Chassis.
0164