
TM 5-2410-241-23-3
0210
DISASSEMBLY CONTINUED
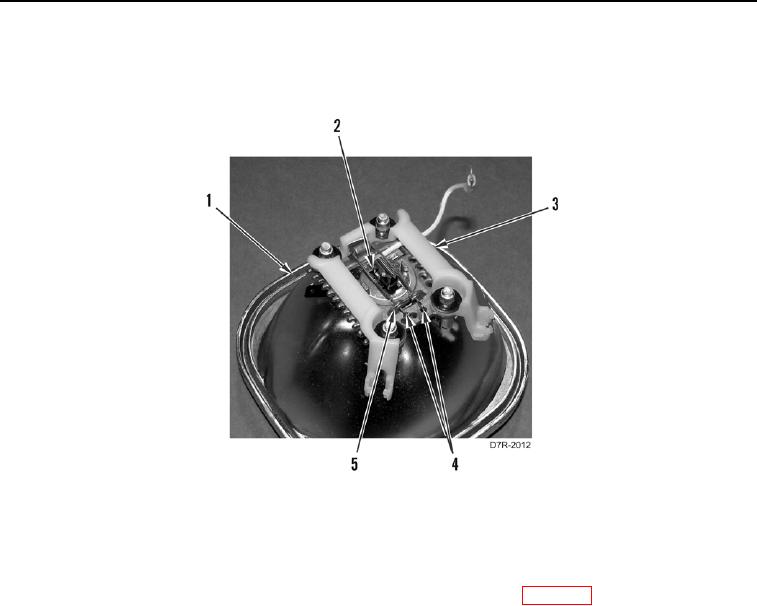
5. Disengage bale wires (Figure 6, Item 4) from plastic retainer (Figure 6, Item 3) and lugs (Figure 6, Item 5).
6. Remove bulb (Figure 6, Item 2) from lamp assembly (Figure 6, Item 1). Discard bulb.
Figure 6. Bulb Assembly Removal.
0210
END OF TASK
CLEANING AND INSPECTION
000210
Clean and inspect all parts IAW Mechanical General Maintenance Instructions (WP 0295).
END OF TASK
ASSEMBLY
000210
C AU T I O N
Do not touch the glass surface of a halogen bulb with bare fingers, as the surface will be
exposed to the salts and oils in the hand. If glass is touched, it must be cleaned
immediately with a gentle solvent such as alcohol. Failure to follow this caution will result
in early bulb failure.
1. Install bulb (Figure 6, Item 2) into lamp assembly (Figure 6, Item 1), feeding the white wire under the plastic
retainer (Figure 6, Item 3).
2. Engage bale wires (Figure 6, Item 4) under lugs (Figure 6, Item 5) to secure bulb (Figure 6, Item 2).