
TM 5-2410-240-23-3
0179
DISASSEMBLY
000179
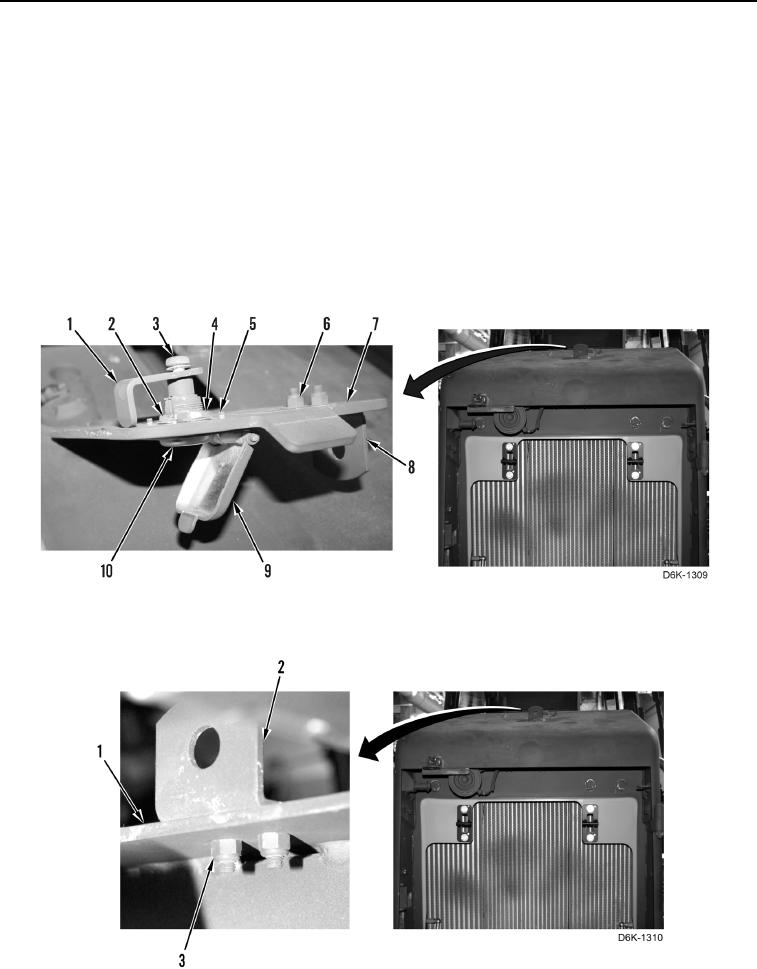
1. Open access cover (Figure 1, Item 7).
N OT E
Note position of latch to aid installation.
2. Remove screw with washer (Figure 1, Item 3) and latch (Figure 1, Item 1) from lock (Figure 1, Item 10).
3. Bend tabs on washer (Figure 1, Item 2) away from nut (Figure 1, Item 4).
4. Open cover (Figure 1, Item 9).
5. Remove nut (Figure 1, Item 4), washer (Figure 1, Item 2), and lock (Figure 1, Item 10) from access cover
(Figure 1, Item 7).
6. Remove four screws (Figure 1, Item 5) and cover (Figure 1, Item 9) from access cover (Figure 1, Item 7).
7. Remove two nuts (Figure 1, Item 6) and bracket (Figure 1, Item 8) from access cover (Figure 1, Item 7).
Figure 1. Access Cover, Latch, Lock, and Retaining Hardware.
0179
8. Remove two nuts (Figure 2, Item 3) and bracket (Figure 2, Item 2) from radiator guard (Figure 2, Item 1).
Figure 2. Radiator Guard Hardware.
0179