
TM 5-2410-240-23-3
0179
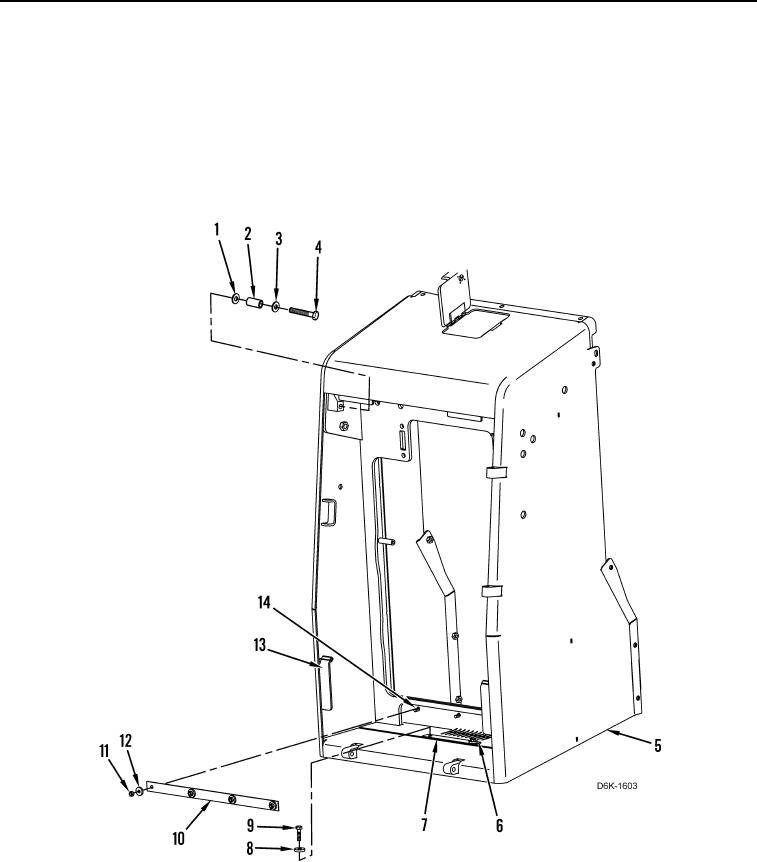
DISASSEMBLY CONTINUED
13. Remove bolt (Figure 4, Item 4), washer (Figure 4, Item 3), spacer (Figure 4, Item 2), and washer (Figure 4,
Item 1) from radiator guard (Figure 4, Item 5).
14. Remove four nuts (Figure 4, Item 11), washers (Figure 4, Item 12), strip (Figure 4, Item 10), and bolts
(Figure 4, Item 14) from radiator guard (Figure 4, Item 5).
15. Remove two bolts (Figure 4, Item 9), washers (Figure 4, Item 8), strip (Figure 4, Item 6), and baffle (Figure 4,
Item 7) from radiator guard (Figure 4, Item 5).
16. Remove two trim pieces (Figure 4, Item 13) from radiator guard (Figure 4, Item 5).
Figure 4. Radiator Guard Hardware.
0179
END OF TASK