
TM 5-2410-240-23-3
0268
WINCH CABLE INSTALLATION
000268
WARN I N G
Winch cable anchors (ferrule and ferrule pockets) are NOT designed to hold rated loads.
Loads applied directly on winch cable anchors may cause winch cable to pull free and
result in sudden loss of load control. Minimum of five wraps of winch cable must be left on
drum to achieve rated load. Do not use knots to secure or attach winch cable on drum.
Paint last five wraps of winch cable bright red to serve as a visual reminder.
Wear heavy leather-palmed work gloves when handling winch cable. Winch cables can
fray or contain broken wires. Never let moving winch cable slide through hands, even
when wearing gloves.
Failure to follow these warnings may cause equipment damage and injury or death to
personnel.
N OT E
Wind winch cable over top of drum.
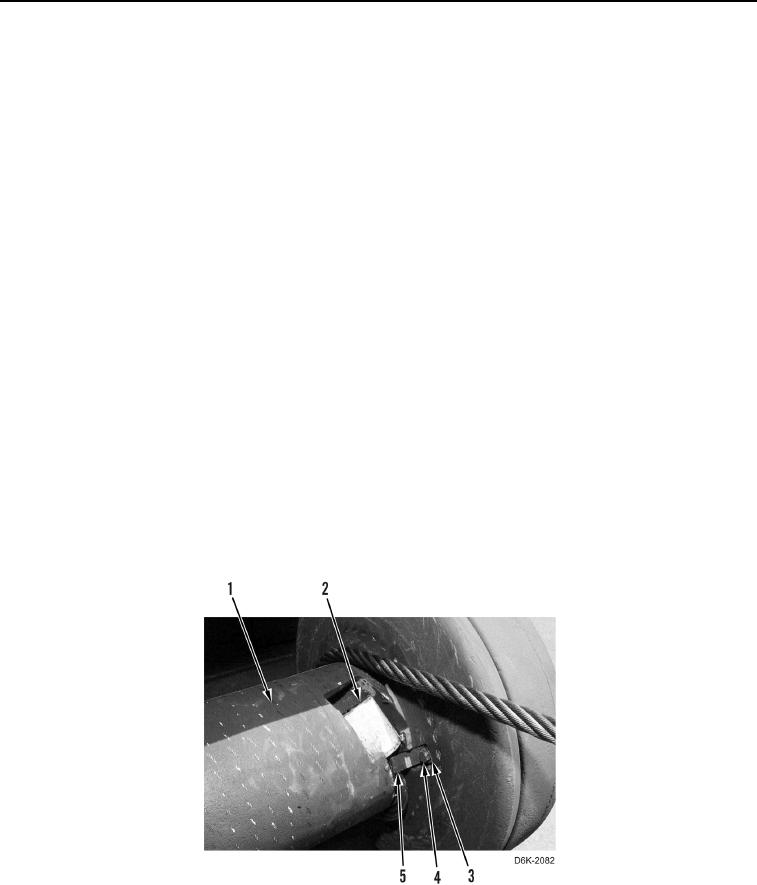
1. Lay winch cable (Figure 4, Item 2) out in a straight line behind machine.
2. Install winch cable (Figure 4, Item 2), clamp (Figure 4, Item 5), new lockwasher (Figure 4, Item 3), and bolt
(Figure 4, Item 4) on drum (Figure 4, Item 1).
3. Turn battery disconnect switch ON (TM 5-2410-240-10).
4. Start engine (TM 5-2410-240-10).
5. Reel in winch cable (TM 5-2410-240-10).
6. Shut engine OFF (TM 5-2410-240-10).
7. Turn battery disconnect switch OFF (TM 5-2410-240-10).
Figure 4. Winch Cable and Retaining Hardware.
0268
END OF TASK