
TM 5-2410-240-23-3
0268
HOOK, CLEVIS, AND LATCH REMOVAL
000268
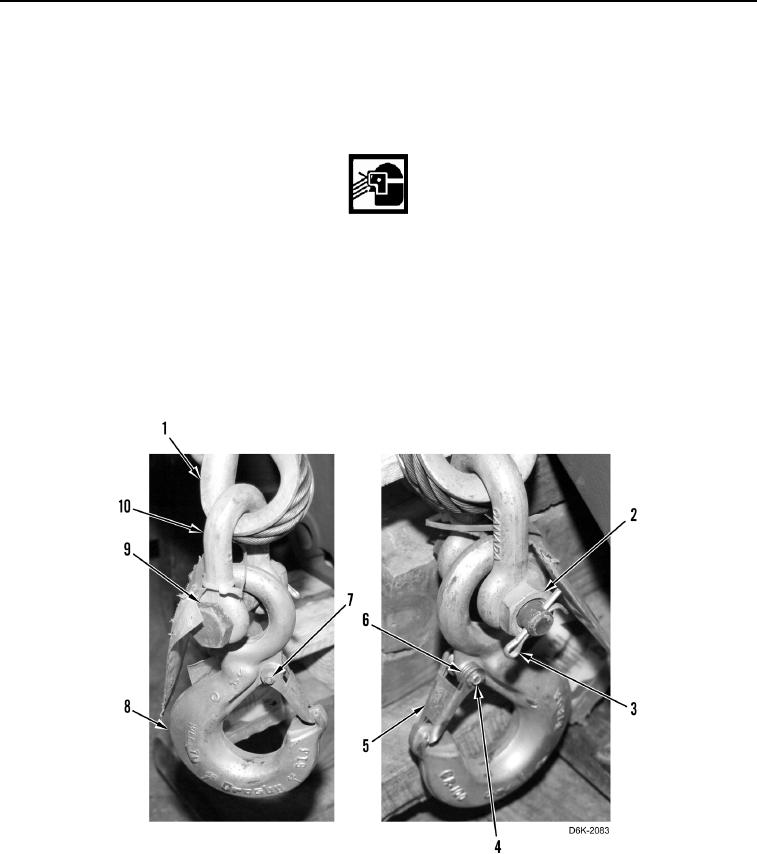
1. Remove cotter pin (Figure 2, Item 3) and nut (Figure 2, Item 2) from bolt (Figure 2, Item 9). Discard cotter pin.
2. Remove bolt (Figure 2, Item 9) and hook (Figure 2, Item 8) from clevis (Figure 2, Item 10).
3. Remove clevis (Figure 2, Item 10) from winch cable (Figure 2, Item 1).
WARN I N G
Wear eye protection when removing latch from hook. Failure to follow this warning may
cause injury to personnel.
N OT E
Note orientation of springs to aid installation.
4. Remove locknut (Figure 2, Item 7) from screw (Figure 2, Item 4). Discard locknut.
5. Remove screw (Figure 2, Item 4), latch (Figure 2, Item 5), and two springs (Figure 2, Item 6) from hook
(Figure 2, Item 8).
Figure 2. Winch Cable, Hook, Clevis, Latch, and Retaining Hardware.
0268
END OF TASK