
TM 5-2410-241-23-1
0053
NATO SLAVE REMOVAL CONTINUED
00053
N OT E
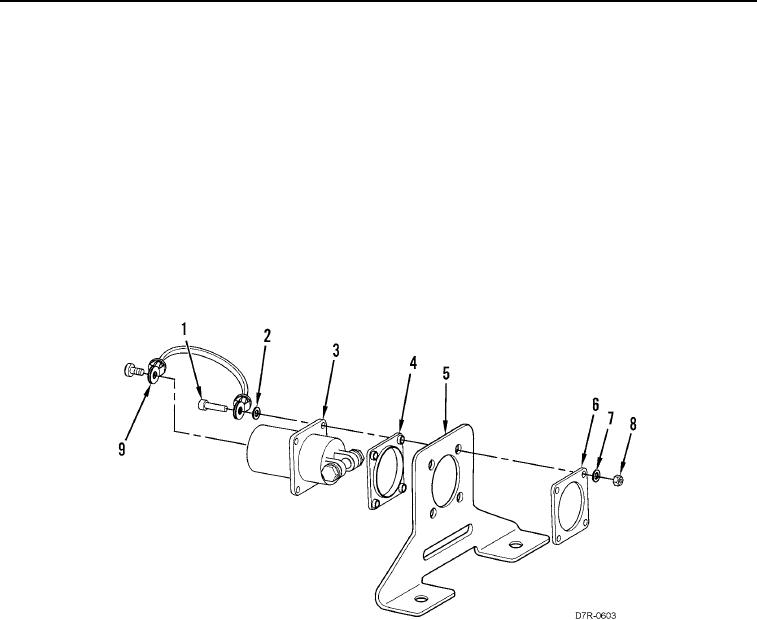
Note orientation of gasket to aid installation.
7. Remove four nuts (Figure 3, Item 8), washers (Figure 3, Item 7) and inner gasket (Figure 3, Item 6) from
bracket (Figure 3, Item 5). Discard inner gasket.
N OT E
Note position of tether to aid installation.
Note orientation of gasket to aid installation.
8. Remove four bolts (Figure 3, Item 1), washers (Figure 3, Item 2), tether (Figure 3, Item 9), NATO slave
(Figure 3, Item 3) and outer gasket (Figure 3, Item 4) from bracket (Figure 3, Item 5). Discard outer gasket.
Figure 3. NATO Slave and Bracket.
0053
END OF TASK