
TM 5-2410-241-23-2
0076
INSTALLATION CONTINUED
N OT E
Install hoses as noted during removal.
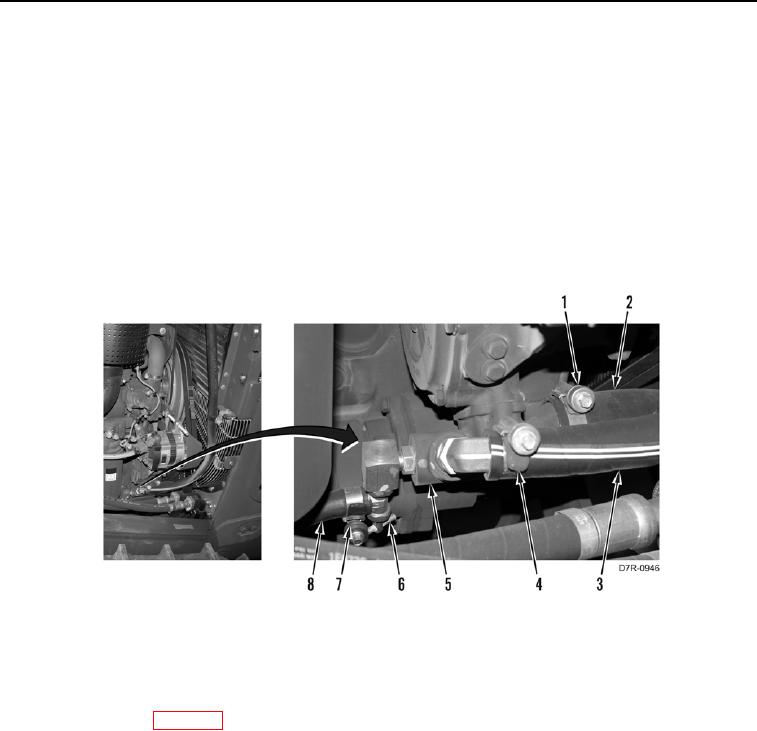
10. Install clamp (Figure 6, Item 7) on hose (Figure 6, Item 8).
11. Install hose (Figure 6, Item 8) and clamp (Figure 6, Item 7) on valve (Figure 6, Item 6).
12. Install clamp (Figure 6, Item 4) on hose (Figure 6, Item 3).
13. Install hose (Figure 6, Item 3) and clamp (Figure 6, Item 4) on fitting (Figure 6, Item 5).
14. Install clamp (Figure 6, Item 1) on hose (Figure 6, Item 2).
15. Install hose (Figure 6, Item 2) and clamp (Figure 6, Item 1) on elbow (Figure 6, Item 5).
Figure 6. Hoses to Elbow.
0076
END OF TASK
FOLLOW-ON TASKS
00076
1. Fill cooling system (WP 0113).
2. Install engine enclosure right door guard (WP 0204).
3. Verify correct operation of machine (TM 5-2410-241-10).
END OF TASK
END OF WORK PACKAGE