TM 5-2410-241-23-2
0097
INSTALLATION
00097
N OT E
Install electrical connectors as tagged during removal.
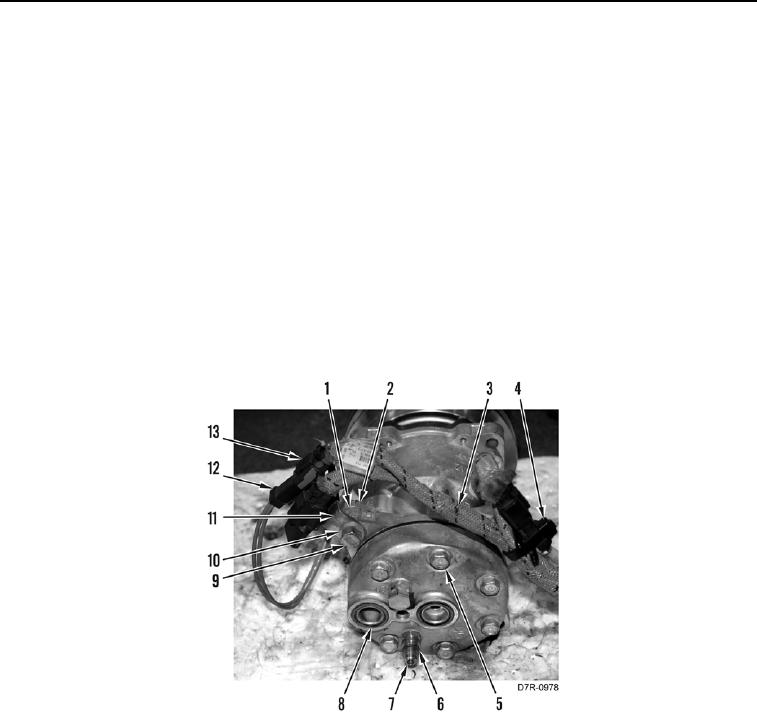
1. Install upper bracket (Figure 7, Item 3), four washers (Figure 7, Item 1) and bolts (Figure 7, Item 2) on machine.
2. Lubricate new O-rings (Figure 7, Item 8) with clean refrigerant oil.
3. Install two new O-rings (Figure 7, Item 8) on compressor (Figure 7, Item 5).
4. Lubricate new O-ring (Figure 7, Item 6) with clean refrigerant oil.
5. Install new O-ring (Figure 7, Item 6) on fitting (Figure 7, Item 7).
6. Install two brackets (Figure 7, Item 11), washers (Figure 7, Item 10), bolts (Figure 7, Item 9), washers (Figure 7,
Item 1), and nuts (Figure 7, Item 2) on compressor (Figure 7, Item 5).
7. Install harness (Figure 7, Item 3) on compressor (Figure 7, Item 5).
8. Connect connector (Figure 7, Item 13) on connector (Figure 7, Item 12).
9. Install new tiedown strap (Figure 7, Item 4) on harness (Figure 7, Item 3).
Figure 7. Compressor Harness.
0097

