
TM 5-2410-241-23-3
0242
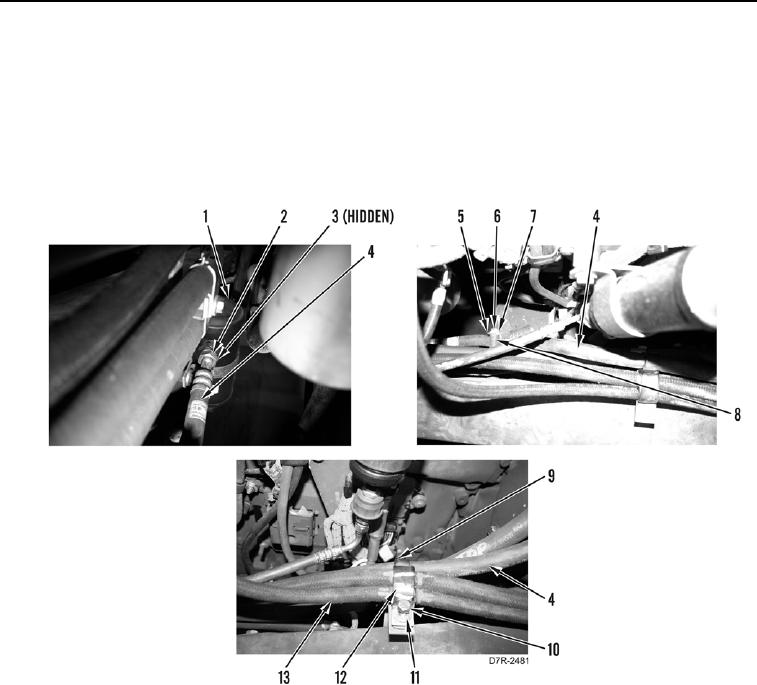
ACCUMULATOR HOSE TO EVAPORATOR COIL INSTALLATION CONTINUED
6. Position clip (Figure 6, Item 12) and hoses (Figure 6, Item 13). Install clip (Figure 6, Item 9) on hose (Figure 6,
Item 4), and clip washer (Figure 6, Item 11) and bolt (Figure 6, Item 10) on machine.
7. Install clip (Figure 6, Item 7) on hose (Figure 6, Item 4), and clip spacer (Figure 6, Item 8), washer (Figure 6,
Item 6), and bolt (Figure 6, Item 5) on machine.
8. Install new O-ring (Figure 6, Item 3) on hose (Figure 6, Item 4).
9. Connect hose (Figure 6, Item 4) on accumulator (Figure 6, Item 1) and tighten nut (Figure 6, Item 2).
Figure 6. Accumulator Hose to Evaporator Coil.
0242