
TM 5-2410-240-23-3
0267
INSTALLATION
000267
N OT E
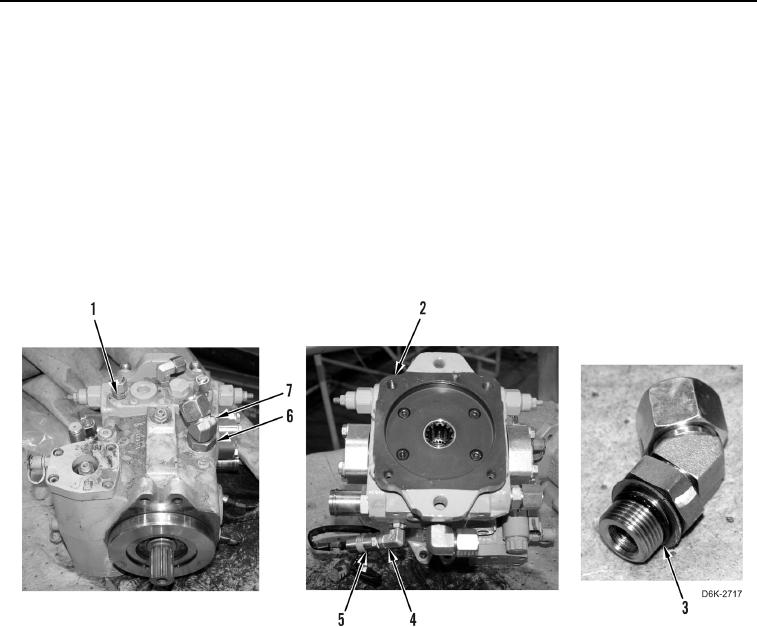
Install elbows and fittings as noted during removal.
1. Apply lubricating oil on 16 new O-rings (Figure 6, Item 3).
2. Install 16 new O-rings (Figure 6, Item 3) on sensor (Figure 6, Item 5), 3 elbows (Figure 6, Item 4), and 5 fittings
(Figure 6, Items 1 and 7).
3. Install fitting (Figure 6, Item 7) on winch piston pump (Figure 6, Item 2) and tighten nut (Figure 6, Item 6).
4. Install five fittings (Figure 6, Item 1) and three elbows (Figure 6, Item 4) on winch piston pump (Figure 6,
Item 2).
5. Install sensor (Figure 6, Item 5) on elbow (Figure 6, Item 4).
Figure 6. Sensor, Fittings, and O-rings on Winch Piston Pump.
0267