
TM 5-2410-241-23-2
0125
INSTALLATION CONTINUED
N OT E
Install bolts as noted during removal.
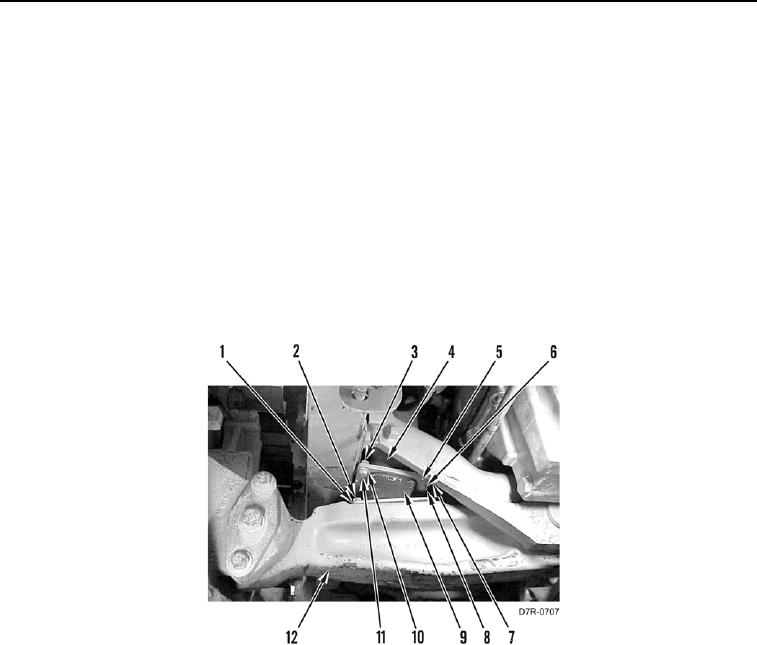
2. Loosely install two spacers (Figure 5, Item 6), four washers (Figure 5, Item 7), two bolts (Figure 5, Item 8), and
nuts (Figure 5, Item 5) on upper pad (Figure 5, Item 4).
3. While holding upper pad (Figure 5, Item 4) in installed position, slide lower pad (Figure 5, Item 9) below it so
two slots engage with spacers (Figure 5, Item 6) on upper pad.
4. Install two washers (Figure 5, Item 1) and bolts (Figure 5, Item 2) on equalizer bar (Figure 5, Item 12).
5. Install four washers (Figure 5, Item 10), bolts (Figure 5, Item 11), and two nuts (Figure 5, Item 3) on outside
edge of lower pad (Figure 5, Item 9) and upper pad (Figure 5, Item 4).
6. Tighten two spacers (Figure 5, Item 6), four washers (Figure 5, Item 7), two bolts (Figure 5, Item 8), and nuts
(Figure 5, Item 5) on inside edge of lower pad (Figure 5, Item 9) and upper pad (Figure 5, Item 4).
Figure 5. Pads.
0125