
TM 5-2410-241-23-2
0126
CLEANING AND INSPECTION
000126
Clean and inspect all parts IAW Mechanical General Maintenance Instructions (WP 0295).
END OF TASK
INSTALLATION
000126
N OT E
A new accumulator must be charged beforeinstallation. Refer to Charge Accumulator in
this work package.
Install hoses and lines as noted during removal.
1. Charge new accumulator (Figure 2, Item 6).
2. Install two new O-rings (Figure 2, Items 8 and 9) and elbow (Figure 2, Item 7) on accumulator (Figure 2,
Item 6).
N OT E
Install hose on elbow as noted during removal.
3. Install accumulator (Figure 2, Item 6) on machine.
4. Install three new O-rings (Figure 2, Items 2 and 11) and tee (Figure 2, Item 1) on machine.
5. Install hose (Figure 2, Item 10) and tube nut (Figure 2, Item 4) on tee (Figure 2, Item 1).
6. Install hose (Figure 2, Item 5) and two tube nuts (Figure 2, Item 3) on tee (Figure 2, Item 1) and elbow
(Figure 2, Item 7).
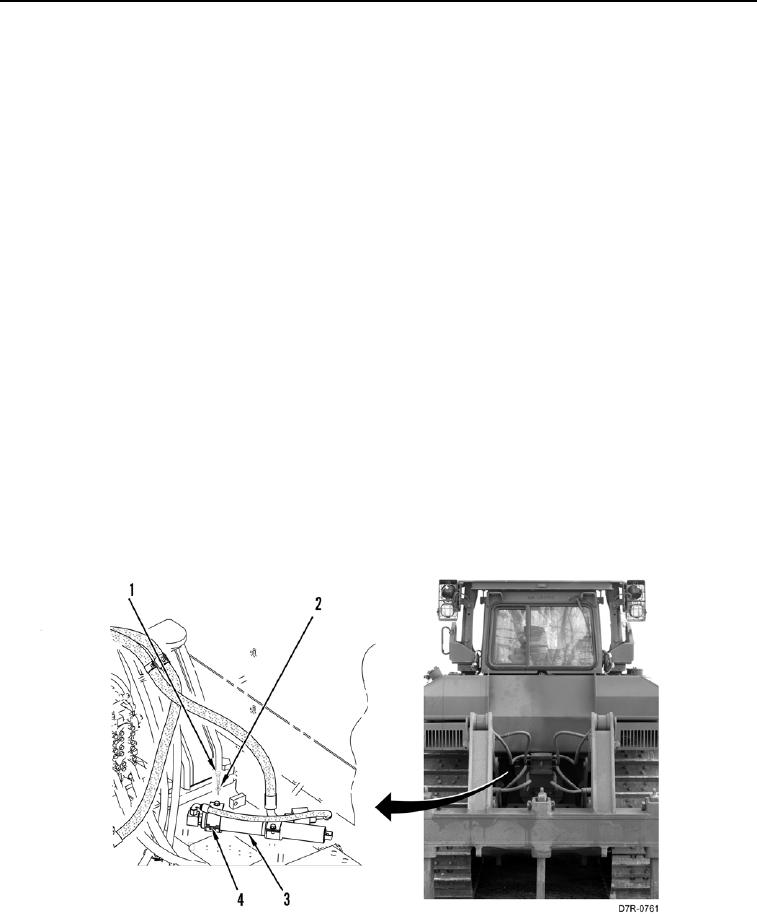
7. Install two clamps (Figure 3, Item 4), washers (Figure 3, Item 2), and bolts (Figure 3, Item 1) on accumulator
(Figure 3, Item 3).
Figure 3. Accumulator Bolts.
0126
END OF TASK