
TM 5-2410-241-23-3
0241
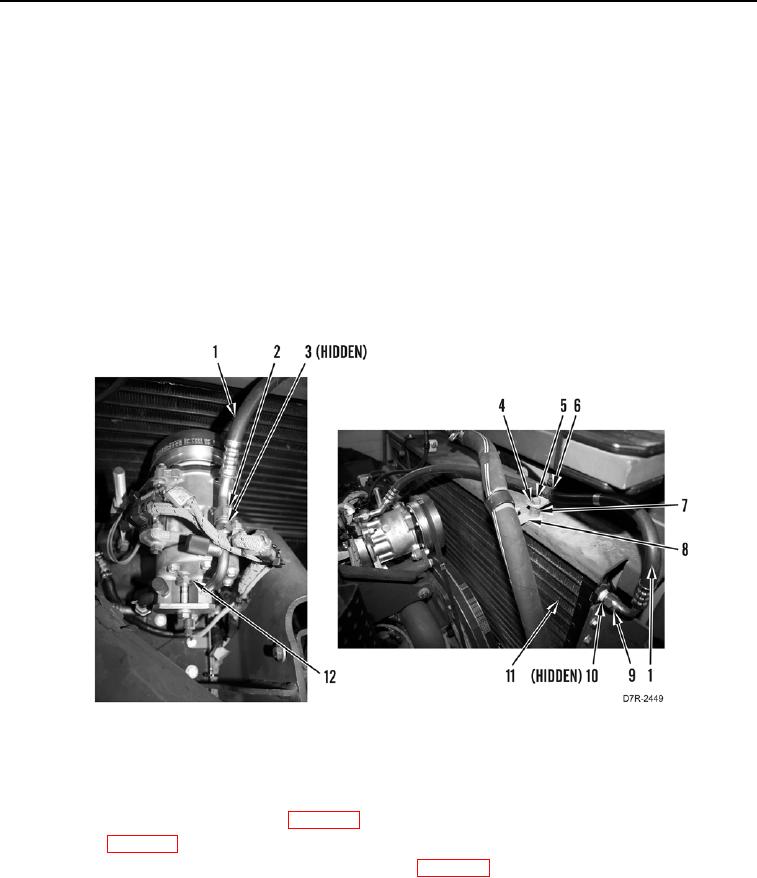
COMPRESSOR HOSE TO CONDENSER COIL INSTALLATION
000241
N OT E
Coat new O-rings with clean refrigerant oil before installation.
Install hoses as tagged during removal.
1. Install hose (Figure 6, Item 1) on machine.
2. Install new O-ring (Figure 6, Item 10) on hose (Figure 6, Item 1).
3. Connect hose (Figure 6, Item 1) on condenser (Figure 6, Item 11) and tighten nut (Figure 6, Item 9).
4. Install clip (Figure 6, Item 6), spacer (Figure 6, Item 7), bracket (Figure 6, Item 8), washer (Figure 6, Item 4),
and bolt (Figure 6, Item 5) on hose (Figure 6, Item 1).
5. Install new O-ring (Figure 6, Item 3) on hose (Figure 6, Item 1).
6. Connect hose (Figure 6, Item 1) on air conditioning compressor (Figure 6, Item 12) and tighten nut (Figure 6,
Item 2).
Figure 6. Compressor Hose to Condenser.
0241
END OF TASK
FOLLOW-ON TASKS
000241
1. Install engine enclosure left door guard (WP 0202).
2. Install hood (WP 0200).
3. Evacuate, charge and leak test the air conditioning system (WP 0263).
4. Verify correct operation of machine (TM 5-2410-241-10).
END OF TASK
END OF WORK PACKAGE