
TM 5-2410-240-23-3
0266
CLEANING AND INSPECTION
000266
Clean and inspect all components IAW Mechanical General Maintenance Instructions (WP 0282).
END OF TASK
ASSEMBLY
000266
N OT E
Remove caps or plugs from fittings and ports and install fittings as noted during removal.
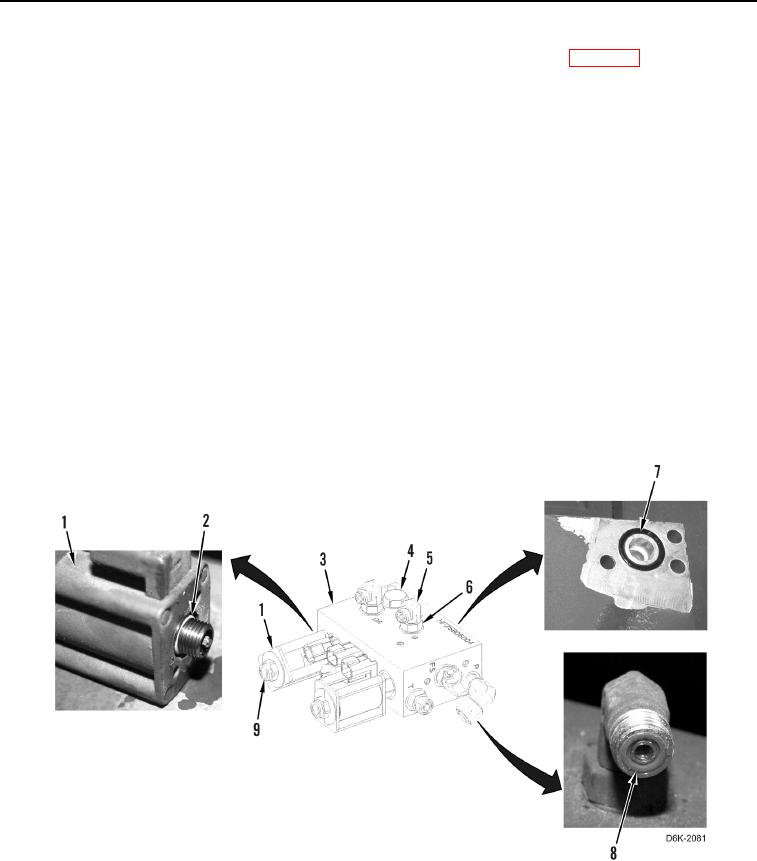
1. Install five fittings (Figure 4, Item 5) on winch manifold (Figure 4, Item 3) and tighten nuts (Figure 4, Item 6).
2. Apply lubricating oil on nine new O-rings (Figure 4, Items 8, 2, and 7).
3. Install five new O-rings (Figure 4, Item 8) on fittings (Figure 4, Item 5).
4. Install three fasteners (Figure 4, Item 9) on solenoids (Figure 4, Item 1).
5. Install three new O-rings (Figure 4, Item 2) on fasteners (Figure 4, Item 9).
6. Install three solenoids (Figure 4, Item 1) on winch manifold (Figure 4, Item 3) and tighten fasteners (Figure 4,
Item 9).
7. Install check valve (Figure 4, Item 4) on winch manifold (Figure 4, Item 3).
8. Install new O-ring (Figure 4, Item 7) on bottom of winch manifold (Figure 4, Item 3).
Figure 4. Winch Manifold, Solenoids, O-rings, and Retaining Hardware.
0266
END OF TASK