
TM 5-2410-241-23-3
0279
REMOVAL CONTINUED
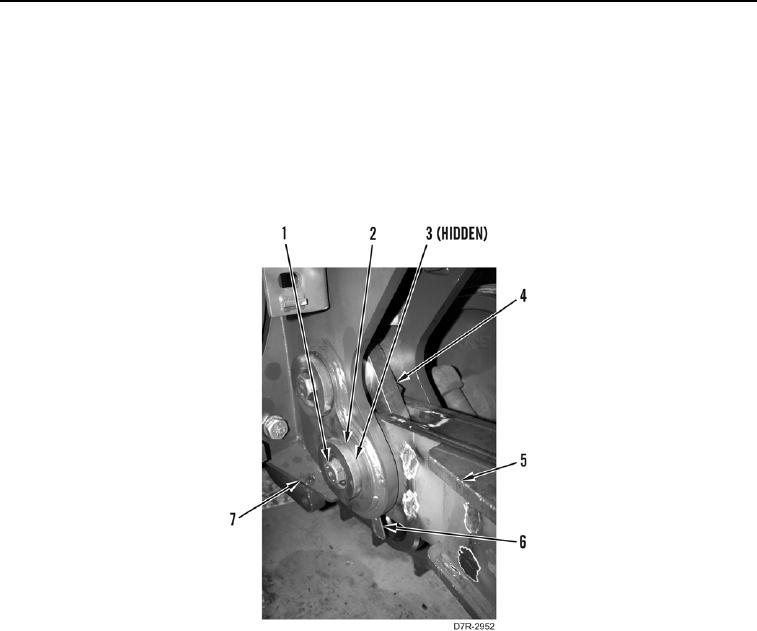
4. Remove two bolts (Figure 2, Item 1), two plates (Figure 2, Item 2), lower pivot pin (Figure 2, Item 3), and shims
(Figure 2, Item 6) from ripper mounting (Figure 2, Item 7).
5. Repeat step 4 for other side of ripper mounting (Figure 2, Item 7).
6. With assistance, remove ripper frame (Figure 2, Item 5) from ripper mounting (Figure 2, Item 7) and tiedown
plate (Figure 2, Item 4), and place on flat surface.
7. Remove lifting device from ripper frame (Figure 2, Item 5).
8. Remove two bolts (Figure 1, Item 3) and lifting links (Figure 1, Item 2) from ripper frame (Figure 1, Item 1).
Figure 2. Ripper Frame.
0279